
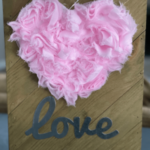
Three Sweet and Super Easy DIY Heart Shaped Wreaths!
I’m teaming up with some fellow bloggers for a February DIY challenge all about hearts for Valentine’s day!

Hello, sweet friends, and Happy first week of February!
Today is our first post for the month and I’m joining a group of talented bloggers who have been challenged by our amazingly creative hostess, Terrie from Decorate and More with Tip to inspire with hearts! All in celebration of course, of Valentines Day!
You can find the links to the other blogger’s projects at the end of the post!!
Now for those that are new here, let me just start by saying I’ve never decorated for Valentine’s Day. NOT EVER!
Yes, this was definitely going to be a challenge for me. But I like a good challenge and besides, I’m a sucker for a little romance, and what could be more romantic than hearts?
How about THREE heart wreaths?!
Three distinctly different, but oh so sweet and SUPER easy heart wreaths!
And of course, budget-friendly too!
So let’s get started with wreath #1!
(Affiliate Links may be provided for your convenience. You can find our full disclosure policy here!)
Heart-Shaped Moss Wreath
Materials needed:
Heart-Shaped Form ( I purchased an inexpensive tinsel wreath for .99) **You can also get these at the Dollar Tree or anywhere that has Holiday supplies.)
(1) package sheet moss ($3.47 @Walmart)
(1) package Spanish moss ($3.47 @ Walmart) ( I used 1/4 of the bag-the rest can be used for moss ball.)
Glue Gun (Low heat preferably)
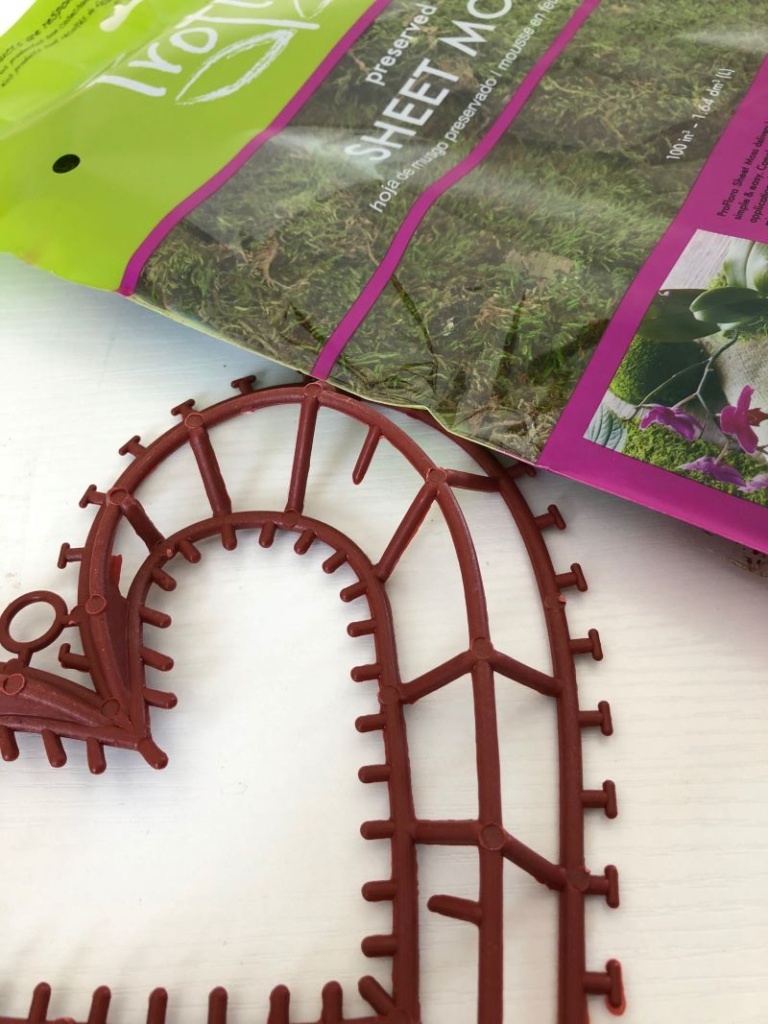
Step One: Unravel the tinsel from your heart-shaped wreath. This will take just a few minutes to do but is so worth it if you end up with a sturdy (and wide) form like this one! It’s perfect for laying your moss onto.
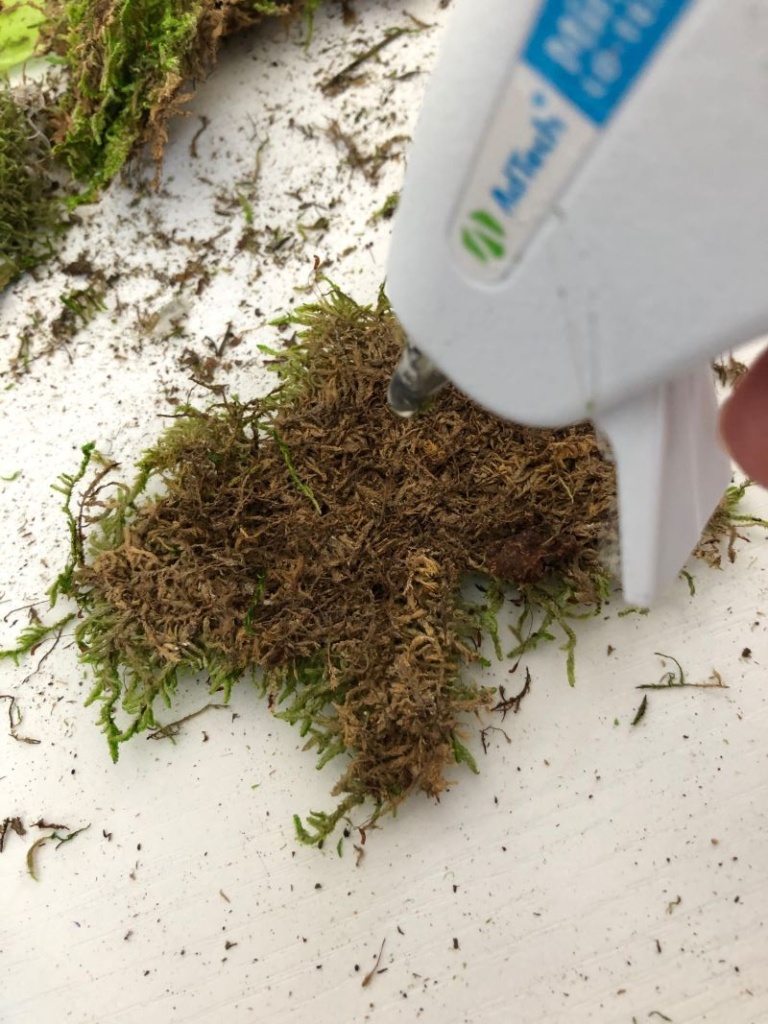
Step Two: Cut (or Tear) the moss into manageable pieces. (I started with half the sheet of moss and ended up using the whole sheet because I covered both back and front.)
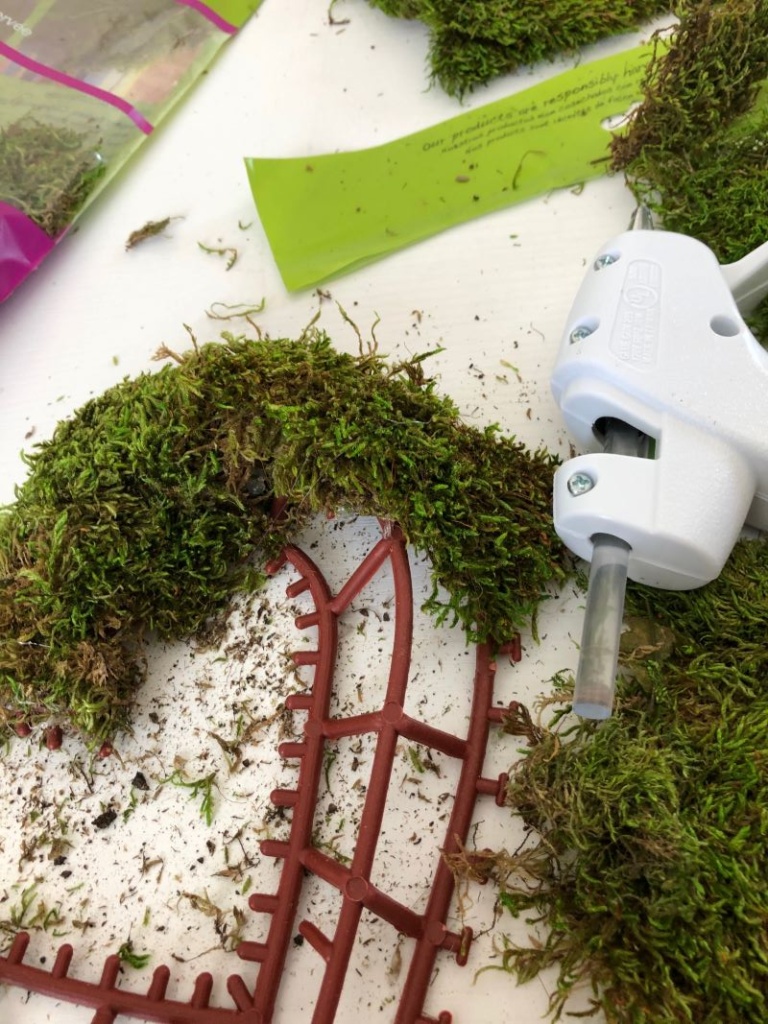
Step Three: Place a thin layer of glue onto the back of the piece of moss and lay it into place on your form. DO this until the entire form, both front and back is covered.
TIP: This is a messy project so I kept my mini shop vac close by so clean up was a breeze!

You can fill in any holes with leftover sheet moss. But I decided instead to use some Spanish moss for this. I love the added texture and pop of light green it provides!

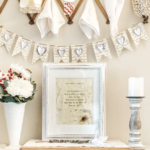
This sweet moss wreath had me dreaming of spring by the time I was done, so I added some pretty burlap ribbon and hung it on my vintage shutter, along with a basket of faux tulips! After all, the groundhog did say early spring, right?
Now for wreath #2!
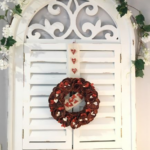
Heart-shaped floral wreath
Materials:
Heart-Shaped Wood Form ($2.77 @ Walmart)
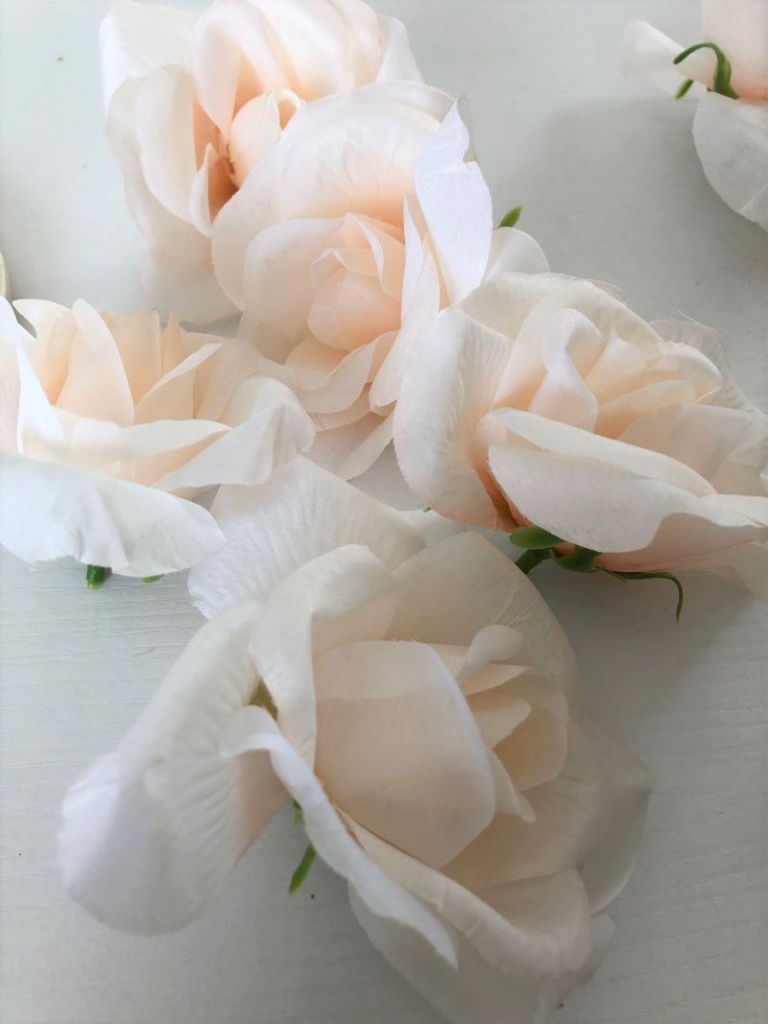
Faux Flowers (Dollar Tree) I used 4 bunches=$4
Glue Gun
Glue Sticks
Ribbon
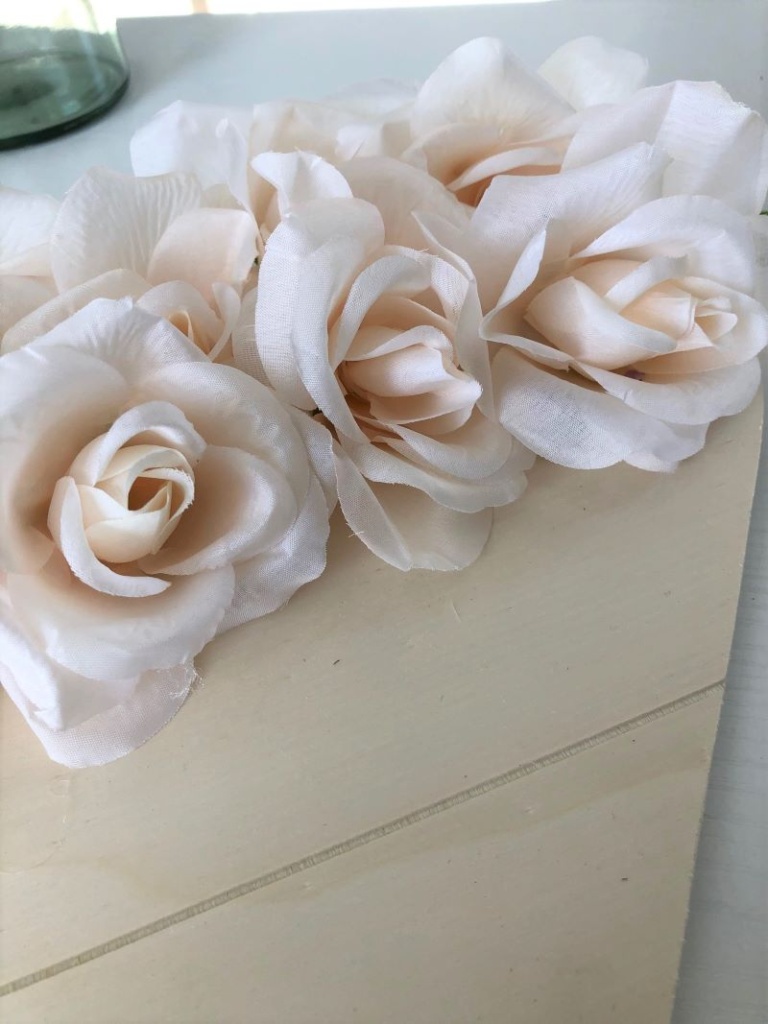
Step One: Remove the flowers from the stems (Just pull up and they should easily pop off)
TIP: If your flowers have a funky base like mine did with spikes of plastic sticking out just use scissors and snip them off. The less ‘bulk’ the better!
Step Two: Glue your flower heads to the wood base
To start I placed my first row of flowers as close to the edge of the base as possible. I then placed a layer of glue on the side of each flower and pressed it into place. I fluffed each flower after the row was done just to make sure I didn’t have a lot of gaps. (TIP: You can fill in any gaps with smaller flowers-see additional step)

I had some of these smaller faux flowers on hand in both this pretty coral and pink that I used to fill in any spaces or gaps that I missed. Just remove them from their stems as well. Place a bead of glue on the base and stick them in where needed.

I think soft pastels are so charming and romantic and full of sweetness! And I just LOVE how the coral flowers compliment the pink and light peach.

I haven’t decided where to hang this wreath yet, but since I’ll be packing away a lot of our “personal” pieces for the move, I thought I’d use my vintage window from the farm one last time!
And finally (drumroll please)…. wreath #3!
Heart-Shaped Eucalyptus Metal Wreath!
Materials:
Wire wreath form ( I used a coat hanger)
Faux eucalyptus stems or garland
Wirecutter
Small Faux Flowers (optional)
Glue Gun
Glue Sticks

step One: Shape your coat hanger into a heart.
I didn’t photograph this part but it’s pretty simple. All you need is your hands and a little bit of patience. When you have the wire-shaped it’s time for paint. I chose gold just because I’m loving the soft metal tones with the greens now, but you could just leave it if you want.
TIP: Leave the hook part up for hanging!
Step Two:
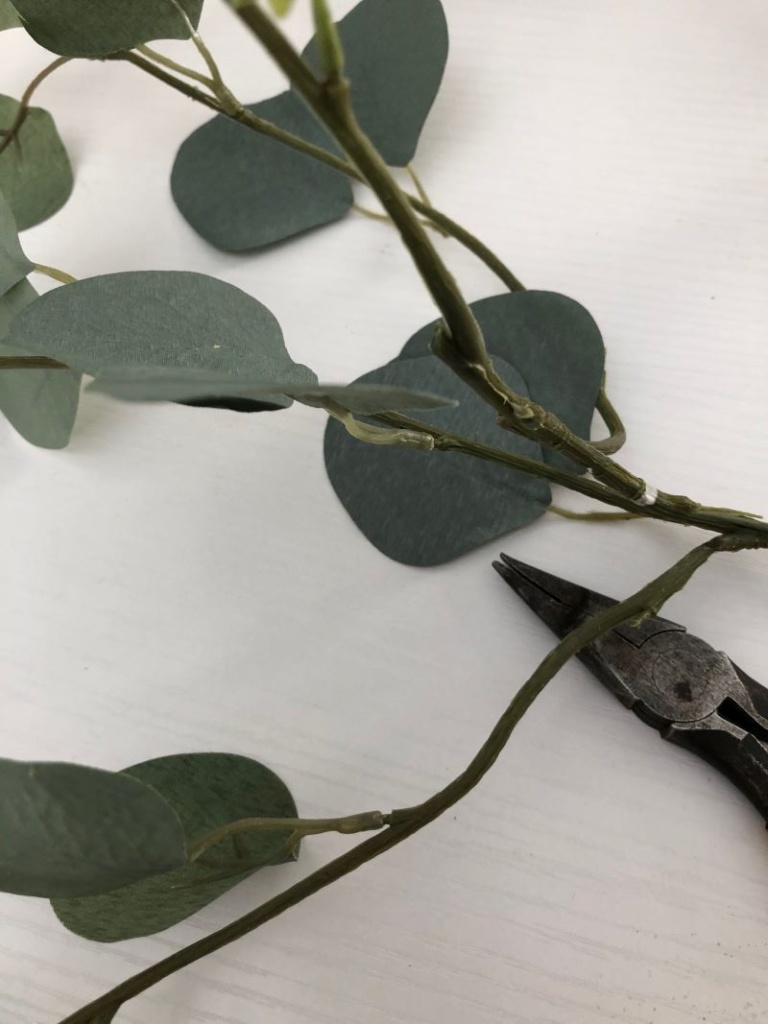
Cut your eucalyptus branches off the main stem.
Step Three:
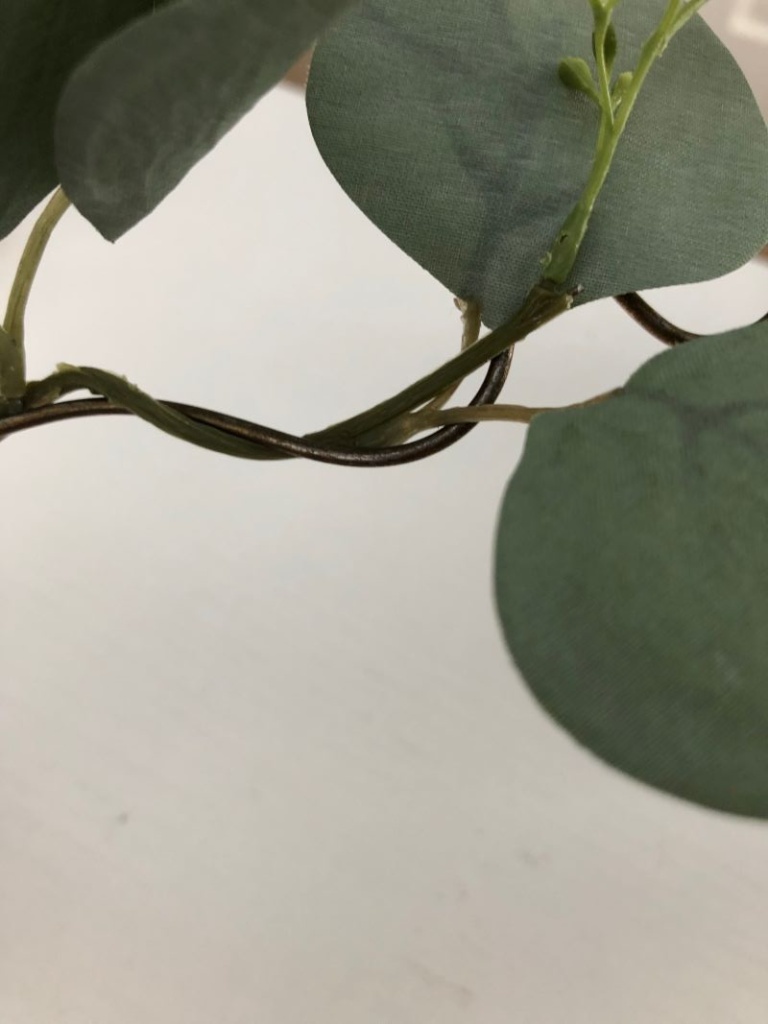
Wrap the branches around the wire and secure them with floral wire.
TIP: Twist and turn the leaves to fill out the wreath as you go!

Once you have attached all of your branches, you can fill in bare spots with loose leaves and faux flowers.
TIP: I glued the loose leaves and flowers on!!!

I love the soft green and pinks together, don’t you? And. this eucalyptus wreath is the perfect spring welcome for guests as they come through our entry and mudroom!
So there you have it!
Three VERY different heart-shaped wreaths!
The total cost each for the first two wreaths was just under $5!!! Eucalyptus stems are a bit spendier than faux flowers so that bumped the price up to just under $7!
This means I have THREE sweet wreaths that I can use all throughout spring for under $20!
Now that’s what I call budget-friendly!
And SUPER easy. And sweet. Oh and yes, romantic!
I hope you found some inspiration to decorate with hearts here today!


SHOP THIS POST
[show_boutique_widget id=”1115674″]
Don’t forget to visit these SUPER TALENTED ladies for even MORE!!!
Thank you so much for stopping by!


You can find more of our DIY’s here!
Have a FABULOUS Wednesday!
Oh my goodness! These are all adorable, clever and look easy to make. Great job!
They all look amazing but I really love that rose one – the softness say’s love all over it. How you placed the brighter colored roses is also perfect. Happy February and sending you good vibes for a great month.
I love all of these!! It’s really hard to choose a favorite. The best part is that they could all be used throughout the year, too. You did an amazing job!
I love all three of these! The floral one reminded me of a “kissing ball” my grandmother made when I was a young girl. I haven’t thought of that in years. Thanks for the memories…. The moss wreath is so simple , it’s perfect. As is the eucalyptus one…Great job and thanks for sharing.
Christine,
All three of these are beautiful! Great tutorial too. Bending the hanger would be my husband’s job.
I pinned to make nest year. You’re always inspiring.
Would you email me how you got the boxes next to each other? Was frustrated I couldn’t get it to work.
Hugs,
Cindy
Oh my goodness! I love them all!! So creative!! I am going to make ken!
Thank you so much, Shae!
Thank you so much, Cindy! I sure will!
Thank you much, Michelle! I LOVE that I can use these year-round too!
Aw Tammy, I’m so glad you liked them at that the wreath brought back a good memory! Yes, all three wreaths are SO simple and so much fun too! Thank you so much for stopping by and for your sweet words!
Thank you so much, sweet lady! I think the floral one is my favorite! The colors just make me smile! I hope your February is off to a great start!!
Christine….you amazed me at making 3 wreaths. How talented you are girl! I love all three of them. Not sure I can say which one I like the best. All three would work for any season or occasion which is super great! budget friendly and can be used anytime of the year…APPLESAUCE! Love it and thanks for joining in the challenge. Your brought it girlfriend!
Everyone of your hearts is so cute! Love the last one. Pinned!
These are all so fabulous, I don’t know which one to pin first! I love how versatile they are and how easily they came together too. I always forget to look at Walmart for supplies so thank you for the heads up on that tip as well. I hope your week has been awesome! Hugs, CoCo
Thank you so much, CoCo! I can’t go into Walmart’s craft department without grabbing something! LOL! This project was so much fun and I’m glad you enjoyed the wreaths! Blessings for an awesome rest of your week!!
Thank you so much, Cindy!!
Aw, Thank you, sweet friend! That means the world to me! I really enjoyed this challenge and I’m so happy you invited me to join! I’m challenged each time and I’ve met some wonderful ladies along the way! You are one amazingly talented lady yourself, Terrie!!
Your wreaths are all beautiful! I especially love the roses! Thanks for sharing!
I love all 3 of these wreaths. I’ve never decorated for Valentine’s Day either. It was actually fun to make a small area ❤️❤️
Thank you so much, Danya! I loved your antique garland! It looked so pretty over your sweet vignette on your vintage sewing machine!
Thank you so much, Paula! That one is my favorite!
All your wreaths are so pretty, you could really leave them up all spring.
So pretty and looks simple to make.
love what you did , great job!!
Teresa
This turned out so pretty!
Great job and it looks awesome too!!
Teresa!
Thank you so much, Teresa!
Thank you so much, Pamela! I think so too!!
I love all of these wreath ideas! The moss wreath is so cute and would be perfect all Spring long.
Thank you so much, Jessica!