
DIY Boho Style Wall Hanging!
How to create a boho style wall hanging for under $10!
Hello, sweet friends! I hope today’s post finds you all well!
My heart has been full these past few days as I try to take in and process all that is going on in our country right now. I struggle to know what to say. What to do, and so I just listen. And I pray.
I try to stay busy too, and when I can, I try to create but that is where my happy place is.
Today I’m sharing a simple but fun DIY that I put together recently!

This beautiful woven tapestry was the inspiration for the project. I apologize I can’t remember what online store I saw it at. I just remember taking a photo of it and thinking to myself, “I can make that!” You know. One of ‘those’ projects.
Of course, that was a few months ago, before the pandemic shut us in. It wasn’t until just a week or so ago that I dawned a mask and FINALLY went to our local Dollar General for a few crafts supplies I was in desperate need of!

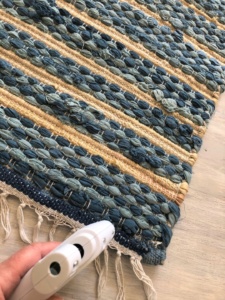
While I was grabbing up as much as my cart would hold, (It’s been a while :)) I found this beautiful Chindi rug for only $5!!! That’s when I remembered that wall hanging! This rug would be perfect for creating my own Boho Style wall hanging!

Here’s what else you’ll need to make your own DIY Boho Style Wall Hanging!
(Affiliate links are provided for your convenience. If you make a purchase we will receive a small commission at no additional cost to you. You can find our full disclosure here.)
Dowel rod (Longer in length than your rug) *** I used a bamboo rod from one of the bamboo blinds I found while organizing the basement. I was going to throw them away! 🙁
Scissors
Glue Sticks
HOW TO CREATE A BOHO STYLE WALL HANGING!
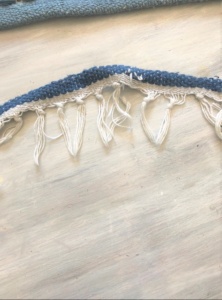
Attach the tassel to the bottom of the rug
If you’re lucky you might just find a rug WITH a tassel. Mine did not have one and I couldn’t find any at our Dollar General so I improvised. I had an old rug that was also in my ‘donate’ box from the basement. It had TWO tassels, so I cut them both off just in case one wasn’t long enough. It was!! Since I had to cut it thick enough to fit on the end of my rug, I was also grateful the blues matched! All I had to do to attach the tassel was put a strip of glue down on the bottom of the rug and lay my tassel down. Once it was pressed firmly in place, I moved on to the top of my rug.
Attach the rug to the rod
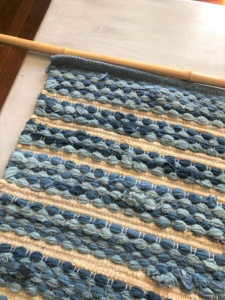
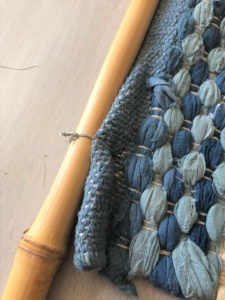
My rod was 30″ long and my rug was just over 20″. So I aligned the rug to the center of the rod and then it was ready to be attached. For this, I cut a piece of wire and pushed it through the top of the rug. Then I wrapped it around the rod several times and cut off the excess wire.

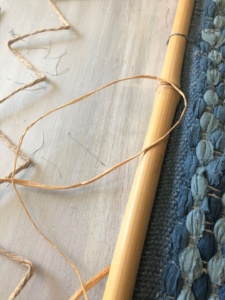
Attach jute string to rod for hanging
I simply cut a piece of jute twine in the length I would need to hang and then tied it to my rod on both ends! The jute twine string played a dual role in that I used it to hang the rug but it also worked perfectly for hiding the wire on either end!!
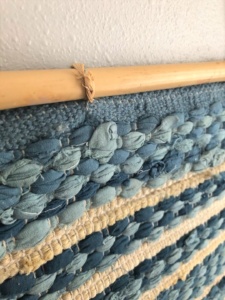
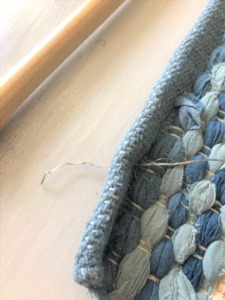
Hide the wire
As for the wire in the middle? I chose to hide it with some raffia I had on hand since it was the exact color of my bamboo rod. You could definitely use more jute twine or yarn.

And that’s it! I FINALLY have my own Boho Style Wall Hanging and it took less than 30 minutes to put together!!! Bonus? Since I had everything except the rug it cost me only $5!!! But even if you had to purchase the other materials you could still make one for about $10 or just under!!
I’ve looked online since I made my wall hanging and the cheapest you can buy them is at Target for $25!

I’ve been needing one more piece for the big wall in my office and now I have it! I just love the soft blue tones and all the texture the wall hanging provides in this space!

So what do you think? Has today’s post inspired you to make your own DIY Boho Style Wall Hanging?
I sure hope so! It was definitely a fun project and SUPER easy too!
Are you looking for more DIY wall art?
Thank you so much for stopping by!


Stay Well!

I’m currently taking a few hours here and there updating the interior of our RV so it feels more like home and this idea is neat. I have this wall and this could work great. Would also be fun to pin some images, notes or even cards on it during the holidays. You have given me an idea friend but first I must finish the floor tiles.
Thank you so much, Carole! This was definitely a fun (and easy) project and I’m so glad it inspired you! Good luck with those floor tiles! I can’t wait to see what you’ve been up to!
Gah – Christine – I’m in love with this idea and sending it to my sisters RIGHT NOW. They’re going to LOSE IT in the best possible way 🙂 Love this uber creative and inexpensive idea. You’ve been on a roll lately and I’m loving it all! Adding my prayers to yours sweet friend, CoCo
Oh my goodness, CoCo! Thank you so much!! I hope your sisters have as much fun creating this wall hanging as I did! Blessings to you and yours my friend! Have a wonderful weekend!
Just lovely! And so many of your projects are perfect! Here by way of your IG account! Pinned, and we hope you will join us at Tuesday Turn About! We open on Tuesdays at 5pm CST! Hope to see you and your wonderful DIYs there!
Oh my goodness, Julie Thank you so much! I really appreciate your kinds words! I would love to join you on Tuesday! Thank you so much for the sweet invite! Have a wonderful weekend!
This is so cute!! And I love how inexpensive it is, too. I love the new name of your blog and your logo looks great!
I love how cute it looks – I’d never guess it was so cheap and easy to make! Well done and thanks so much for the inspiration!
Thank you so much, Katerina! It was SUPER easy and fun too! I’m so glad you liked it! Thank you for stopping by!