
Bathroom Vanity Makeover
an outdated big box store vanity gets a modern makeover!
Hello, friends!
For those who have been following along, Michael and I are FINALLY reaching the finishing line in our upstairs full bath remodel.
I’m super excited to share all the details soon!
But today, I’d like to share one of the ‘bigger’ DIY’s in this project.

The vanity.
It wasn’t much to look at that is for sure. A VERY basic, big-box store-SUPER budget-friendly vanity.
Or, in my own words…just plain UGLY!

But it was still functional, and besides a small burn on the top (from my hair straightener) it was in good shape.
So I decided to try giving it a “quick” makeover instead of buying a new one.
Let me start this tutorial by saying there was nothing “QUICK” about the vanity makeover!
Even after reading several online tutorials, I STILL found out on my own that this project is not for the faint-hearted!
It takes time and some skill, but most of all…patience.
Here’s what you’ll need to get started.
(Affiliate links are provided for your convenience. If you click through the links and make a purchase, we will receive a small commission at no additional cost to you. Our full disclosure is here.)
Materials/ Supplies
- Screwdriver (to remove hardware)
- Spackling (to fill in any dings or holes)
- TSP Heavy Duty Cleaner
- Gloves (for using with the TSP)
- Primer
- Sander
- Sandpaper
- Paint ( I chose Behr Totally Black in Satin finish)
- Paintbrush
- Small foam roller
- New Hardware ( I chose these)
- Clear Polyurethane
step one: remove the doors and hardware from the vanity.
Removing the doors and hardware is pretty easy. All you’ll need to do is remove the doors from the hinges (leaving the hinges intact) and then remove the handles from the doors. **As you are doing this take a VERY good look at the doors!
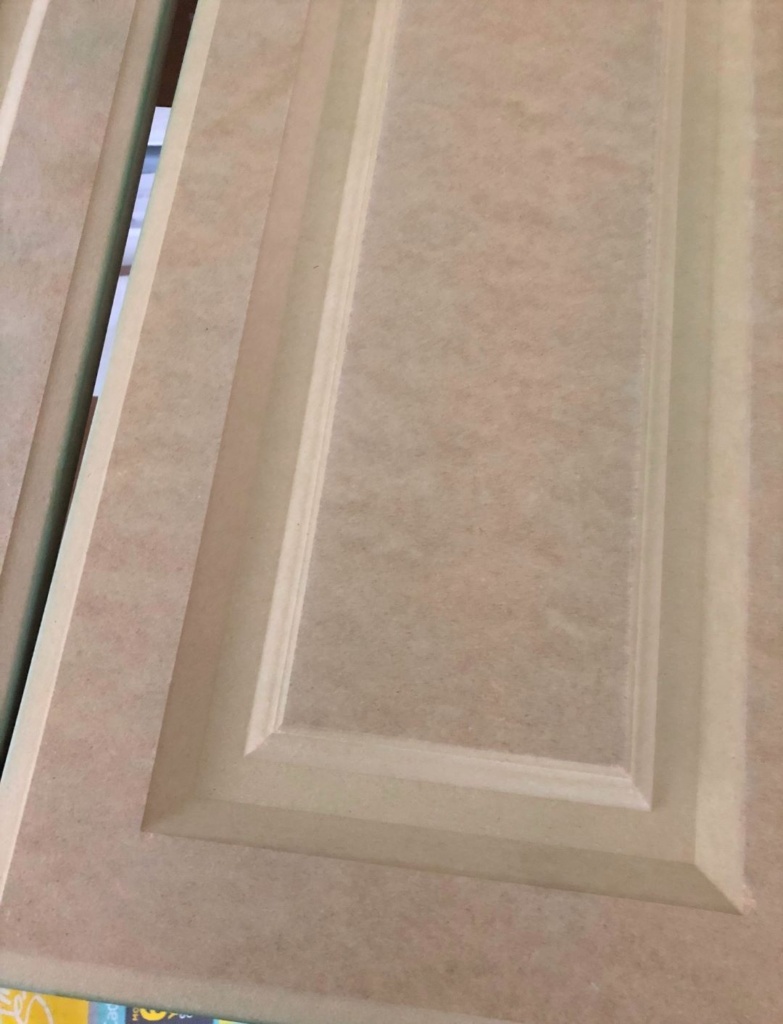
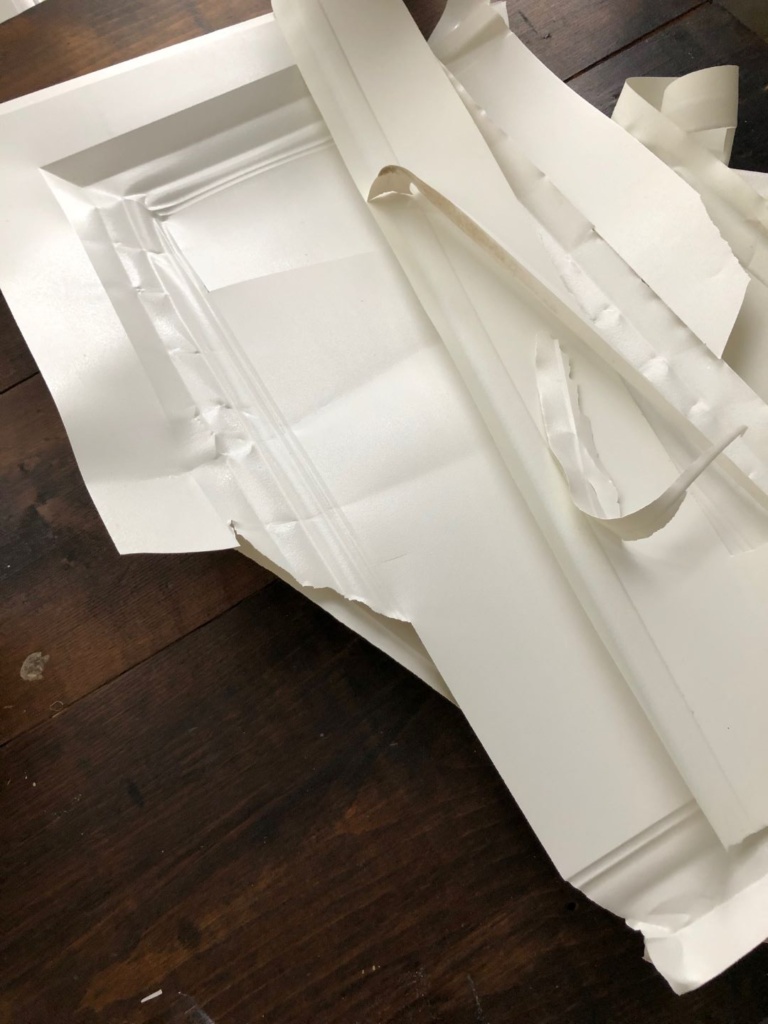
If your vanity is like mine you will discover that it is made out of cheap laminate particleboard. Worse? That laminate is covered with a plastic coating. The good news? That plastic coating came easily off the two doors. The bad news? Not so much off the base of the cabinet!
But before I get to that, let’s talk about the doors.
step two: prepare your doors for paint
Once the plastic coating has been removed, you’ll need to wipe the doors down with TSP and water to remove any glue, etc. Then give each one a good sanding. Since we are working with laminate I didn’t want to scratch it too much, so I used 120 grit. Once they have been ‘roughed’ up a bit, give them another good wash down (don’t oversoak them since it is laminate) with the TSP. Then let them dry. (About 15 minutes)
step three: prime the doors.
I gave the doors two light coats of primer. I allowed drying time between the two of 30 minutes. Then I allowed them to dry overnight.
step four: paint the vanity doors

Since I didn’t want any brush lines-I used a foam roller for the main areas and a good quality brush for the areas I couldn’t get to with the roller. I gave each door two coats, with a drying time of 30 minutes in between each. Then I let the doors drying completely overnight.
Meanwhile, I had the base to work on.
Did I mention that it too was covered in that plastic coating? And oh ya, btw it doesn’t come off!! At least not easily, so if you plan on painting over it, which I did, you REALLY need to prep!
prepping the base for paint
Just like the doors, you’ll need to wipe the base down with TSP and water.
Then you will need to give it a good sanding. This time I used an 80 grit sandpaper and really roughed it up well. Unfortunately, even after sanding the surface, it was still glossy and I kept thinking of all the horror stories I’d read during my research. Folks had complained that after all their hard work the paint literally WIPED right off!
I knew that TSP was good for prepping the surface, but I wasn’t sure if it was good enough to work on this material. So I did some more research and found this product called Klean Strip. According to all the positive reviews, it works amazingly on de-glossing cabinet doors so I thought, what the heck. **Like the TSP I would recommend using gloves when using this product.
After I applied the Klean Strip and wiped the base down. I allowed it to dry for about 30 minutes.
Then it was time for primer. (Two coats total: 30 minutes of drying time in between). Overnight drying time too, just like the doors.

paint the base
I gave the base a light coat of black paint and allowed it to dry for 30 minutes. I literally held my breath as I ran my fingernail down the corner of the base to see if the paint would come off. When it didn’t I DID the happy dance! Whew! What a relief!
Now I’m not sure that the extra step of the deglosser is what did it or not? But I’m glad I did it anyway!

It was SUPER hot and humid on the day I decided to paint. And even though we had the central air on, I decided to give the base some ‘extra’ drying time. So instead of the usual overnight, I let it dry for 2 full days.
Once it dried it was time to add on some legs. This step is TOTALLY optional. Our vanity has always felt a bit ‘low’, so I figured I’d raise it up a bit, as well as, make it look more like a furniture piece.
Materials/ Supplies
- Newel Post
- Measuring Tape
- Table saw
- Sandpaper
- Primer
- Paint (Same as I used for base)
- Drill
- 2 ” Drywall Screws
I couldn’t find any legs that were the right height online,(we wanted to raise our vanity up 2 inches) so Michael came up with an idea to use these newel posts we had leftover from our staircase update.

We just need three legs since the back far left can’t be seen and it’s screwed to the wall anyway.

Once the legs were cut to size, I gave each of them a couple of coats of paint.

Then I just screwed each leg into the three corners and VIOLA! Our vanity has legs! Woot! Woot!

It also has new hardware and a new faucet!

Oh, and did I mention I was able to get that burn removed from the top?

It turns out it was only a surface burn. So I used 220 grit sandpaper and it totally disappeared!

I’m SUPER happy with the way this vanity turned out! And I’m even happier that the paint STUCK!

The last thing I plan to do is install a shelf inside for extra storage!
I hope today’s tutorial inspires you to take a second look at your old outdated bathroom vanity. Yes, it does take time to update them. And patience. But I really think it was SO worth it.
We had all the materials except for:
Faucet: $40.00
Hardware: $ 7.00
So the total cost to update our vanity was $47!! A bargain compared to what they cost brand new!


Thank you so much for stopping by!

[mc4wp_form id=”2342″]

This is such a fabulous makeover, Christine! I’ve painted our bathroom cabinet and our kitchen cabinets and you are so right – it is not for the faint of heart! I love the color and the hardware you chose and how you add the feet to the base too. It looks like such a custom piece. Hugs and I can’t wait to see more, CoCo
Christine, such a fabulous transformation and I can see why you need a brave heart. It’s a humongous task and I bet the happy dance was even happier with those 3 legs. Brilliant job and a very neat look. Loved those handles. My chrome handles from the vanity are tarnished, need something like yours. Perfect.
Thank you, my friend! Coming from you that means a TON! This is the first time I’ve done a vanity over and I’m not sure why, but I imagined it to be so much easier to do! The feet ended up not being as “awesome” as I thought they would be, but at least it raised up the vanity to where I wanted it!
Thank you so much, Hasin! When I first started the project I had no idea it would be so involved! The legs were an afterthought and I wish they stood out a bit more but at least it raised up the vanity to where I wanted it to be!! I LOVE those chrome handles and they were less than $10!!
This looks amazing! It looks like you bought it new! Great tips on getting the burn mark off and using a roller brush. I can’t wait to see your bathroom! Looks like you’re going to beat me at finishing the bathroom since Mike’s saw burned up. And of course, it’s been on order at Lowe’s for 2 weeks and they have no idea when it’s coming in. So frustrating! All we have left is the drawer front and doors for the built-in. Ugh! By the way – that floor is so pretty!!!
Thank you so much, Michelle!! Too funny that our husbands are both named Mike! LOL! So sorry to hear about the saw burning up! UGH! It’s always something when your knee-deep into a project, isn’t it? As for finishing before you. Not too sure about that. We still have a few things to do before we are completed so hopefully you get that saw! P.S. I LOVE that floor SO much!!!
What beautiful results I’m not surprised because you did not skip any necessary steps. I admire your patience, (this I do not have) I particularly love the legs. Not only is it more attractive but it makes it more comfortable to use because of the height. When I had my kitchen remodeled I asked them to make my counters higher because I am tall and it makes it much more comfortable to use.
first, a disclaimer: I am NOT handy around the house or creative in any way shape or form. I have been afraid to tackle almost every project around the house for fear of failure or disaster.
Question: um, how can one tell if the old vanity from 1974 has a laminate coating or is a painted wood or MDF? I’m afraid to go poking or scraping it for fear of making it worse than it already is. Yet it is in dire need of new paint or finishing.
Help! suggestions?
thanks
Haze
PS and yes, yours looks lovely
Thank you so much, Haze! I TOTALLY understand your fears! When it comes to DIY I’ve had my own failures and disasters! Trust me! I could tell you some stories that would make you cringe or laugh, LOL! But I digress. Back to your question. I would say it’s most likely that your vanity is laminate or MDF. Very rare to have a real wood vanity unless it was a piece of furniture made into one. With that said, no two laminates are alike. Some have no issue taking paint and others, like mine won’t hold it. So your best bet is to do a paint test on a small area that isn’t too noticeable if possible. Just put a light coat on the small area and allow it to dry for at least an hour. When it’s dry use your finger nail and lightly scratch the paint. If it comes off easily you’ve got a laminate coating and it will need to be removed. If not. Paint away!!! Good luck, and if you have any further questions, please don’t hesitate to email or leave another comment!
Thank you so much, Christine! I’m right there with you on making counters higher and I’m short! LOL! We love the height now. No more bending over to brush our teeth! YAY!
This looks amazing! Such a beautiful transformation! Thanks for sharing these easy to follow instructions for bathroom vanity.