
Rustic Wood & Glass Wall Vase
how to create modern farmhouse wall art in five easy steps!
Hello, sweet friends!
Today I’m sharing another SUPER easy DIY project! You might remember it if you checked out our post on the final reveal of our upstairs bathroom remodel!

I love how this rustic wall vase ended up turning out, but it wasn’t originally what I had planned for the wall space.

Initially, I had ordered two items similar to my wall vase. I thought both would be perfect for that awkward wall. Unfortunately, one was too big and bulky, and this cute rain gauge ended up going on backorder, so I canceled this one and returned the other.
After a week or more of trying to find a replacement, I decided what the heck, I might as well just make one myself!
Cause that’s what DIY’er’s do right?
how to make a rustic wall vase
Materials/Tools
- A piece of wood. (I used a scrap piece of 1/4″ plywood cut to size)
- Circular saw
- Sandpaper
- 1/2 ” wide Hose Clamp
- 1/4″ wood screw
- Screwdriver
- Paint (Black)
- Paint Brush
- Small Glass Vase ( I had one from Michael’s but these are similar)
- Wall hanging hardware
- Sealer (optional)
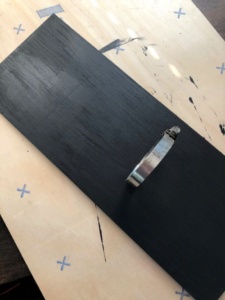
cut & sand your wood

You could use whatever kind of wood you have on hand for this project. It just so happened this 1/4″ plywood was in our scrap pile. My measurements were 6″x 16″ but you could cut yours whatever size fits your wall space. Once I cut the plywood, I gave it a good sanding to get rid of the sharp edges.
paint & Seal your wood

I chose to paint the wood piece black because it complimented the rest of the wall art in the bathroom. You could definitely stain the wood, or paint it whatever color looks good in your space! I gave the wood one good coat and allowed it to dry for 30 minutes. Then I gave it one more coat and let it dry for another 30 minutes.
**Note: I also gave the wood one coat of poly. This is totally optional but since my wall vase was in the bathroom, I thought it best with all the moisture.
attach & Adjust the hose clamp
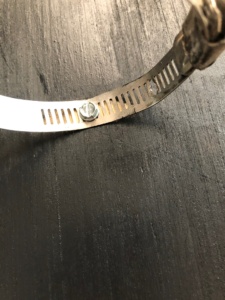
I used a 1/4″ wood screw to attach the hose clamp. If your wood is thicker than mine you will obviously need a longer one. I simply poked the screw end through the ribbed part of the clamp and screwed it in place.
Note: I left my clamp unpainted as I liked the old vintage look of the one I had. But you could certainly spray paint your clamp gold, or silver, or whatever color compliments your wood base.
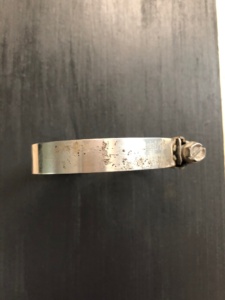
set the glass vase inside of the hose clamp

My bottle/vase fits pretty snuggly inside the clamp, but you can adjust the worm gear mechanism (screw on the side) to be wider or narrower depending on your vase.
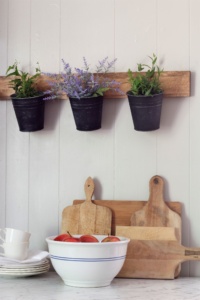
hang it

It will all depend on how heavy your wall vase is when it comes to what you should hang it with. Since mine was pretty light (under 5 lbs), I just used a simple sawtooth picture hanger.
As far as what you can put in the wall vase? Well, the options are literally endless!

I’ve put eucalyptus, a dried hydrangea, and a few fall stems so far. During the holidays pine or some greenery will be nice.

Since I had all the materials needed including wood, paint, & vase, the total cost of this project was $0!! That’s what I call budget-friendly! And since I can change it out whenever I want, it is also SUPER versatile and functional too!

I hope you enjoyed today’s quick and easy DIY!


Looking for more wall art projects?
Thank you for stopping by!


Great project Christine – love the simplicity and when fall arrives this is when I crave a less mobile lifestyle. Think it’s just because I’m stuck inside more often. A few stems in a vase or jar goes a long way to making a space feel like home. Great idea!
Hugs – Carole
This is really beautiful Christine and so creative too! I love the way you can change out the flowers and stems throughout the year. That is super clever! Hugs, CoCo
Thank you, CoCo! It was a fun project and I’m looking forward to changing it up seasonally.
They definitely do, Carole! And yes, there is something about fall that makes you want to hunker down and nest. But I totally get that being stuck inside can drive one crazy too! Thank you, my friend! Hugs!
What a cute idea!! I actually have all the things to make one of these. Pinned so I can remember to make it! I love it!!
That’s awesome, Michelle! It was definitely a fun (and easy) project! Thanks for pinning! Have a blessed day!