
DIY Woven Boxes for Office Storage
How to create Target-Inspired Woven Boxes using a surprising and VERY inexpensive material!
Hello, friends!
I know I haven’t given you all any updates on our home office makeover yet. So here goes.
It’s still a work in progress!
LOL! Sorry. But that’s the truth of it.
Things kind of got delayed these past two weeks because first Michael and then I came down with a nasty cold virus. (And no thank goodness it wasn’t Covid-we were tested!)
Anyhoo. We are back at it, and hopefully, I’ll be able to share more progress next week!
But even though I don’t have any progress on the room, I do have a fun DIY I created FOR the office to share!

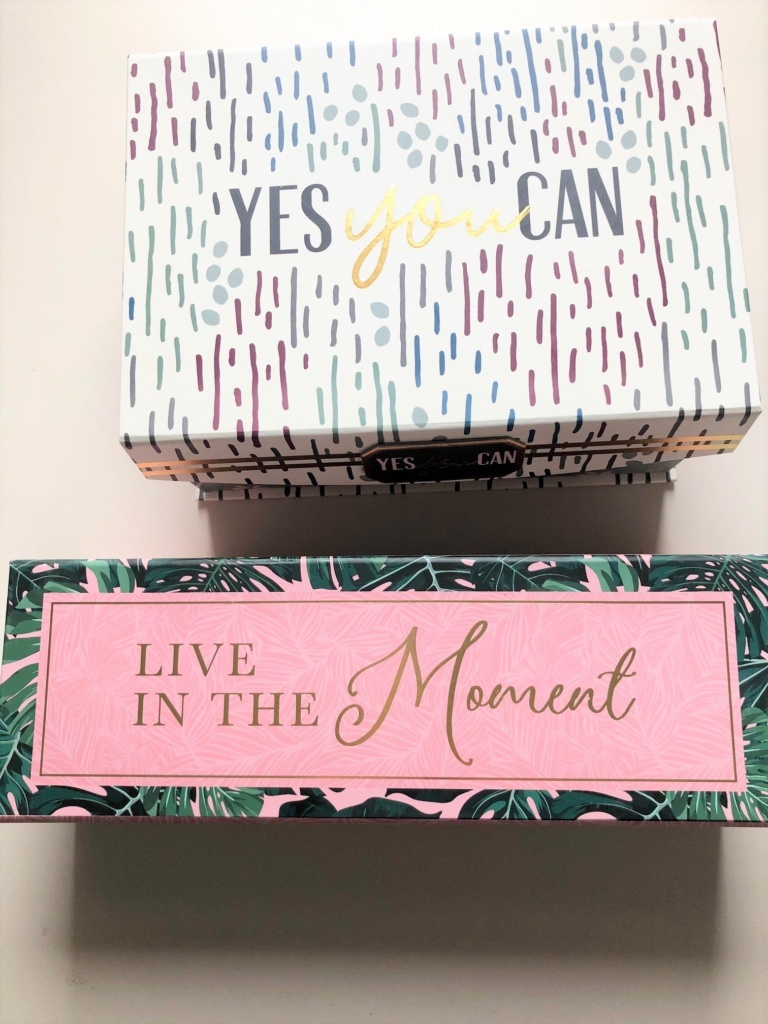
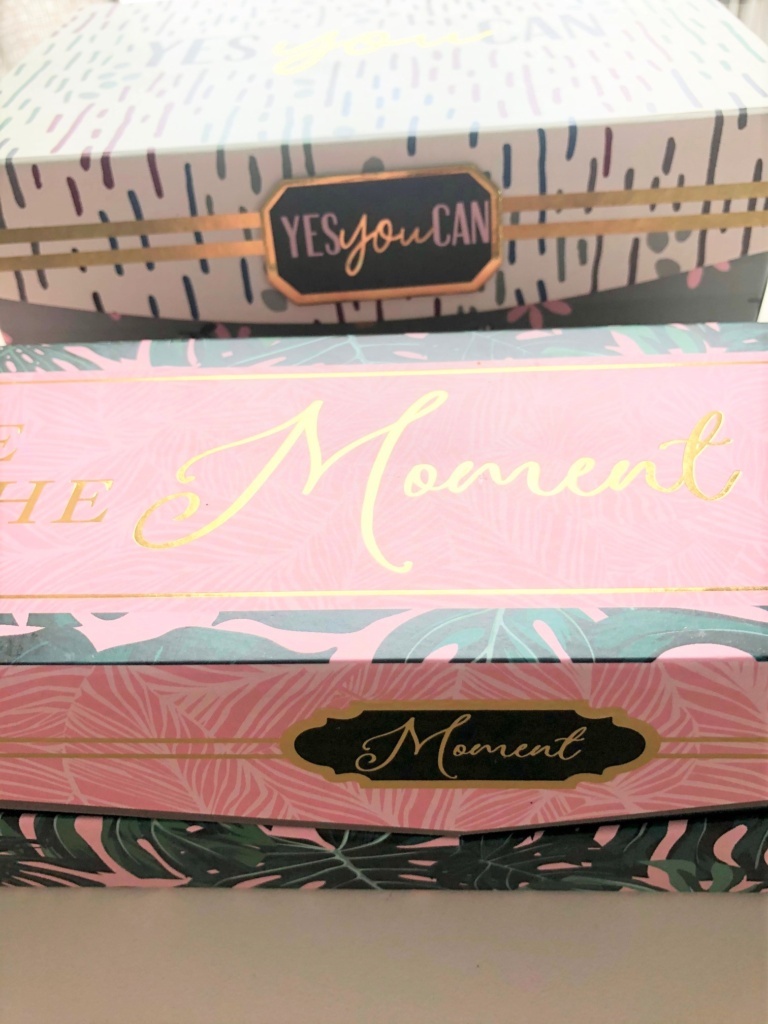
I was inspired by these fun woven boxes that I recently found at Target.
They weren’t even that expensive either. The large one was only $15!! I almost bought them, but then I wondered. Wouldn’t this be a fun challenge to see if I could find an even MORE inexpensive way to make one?
So I set out to look for a material that would look similar, as obviously these boxes are woven.

When I came upon this Grip and Stick Shelf Liner in my search, I knew I’d found a winner!
Now I just needed to find inexpensive boxes. The first thing I thought of was shoeboxes! Unfortunately, I remembered I threw the one I did have out a few weeks back. So it was back to the drawing board.
A few days later I stopped in at my local Dollar General and found these boxes for $1 each. They had some really pretty ones too which I didn’t have the heart to cover, so I grabbed up these two that aren’t exactly my style and headed for the checkout!
what you’ll need to create woven boxes
- Boxes ( Shoeboxes, boxes from online orders, or inexpensive boxes like I found will do!)
- Chalk Paint ( I used white because my shelf liner was white)
- Shelf Liner
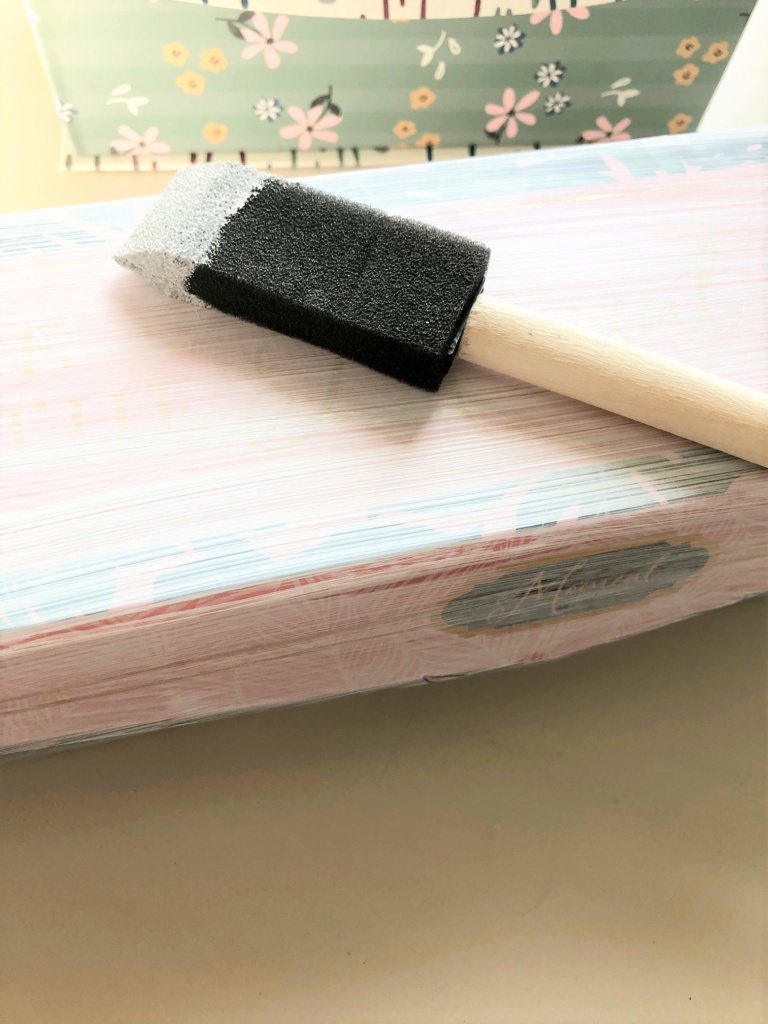
- Sponge Paint Brushes
- Spray Adhesive
- Scissors
- Leather Pulls (these are similar) or you could use leather key chain pulls (hardware store) or if you’re like me, straps off an old purse!
- Glue gun
how to make DIY woven boxes
PAINT YOUR BOXES
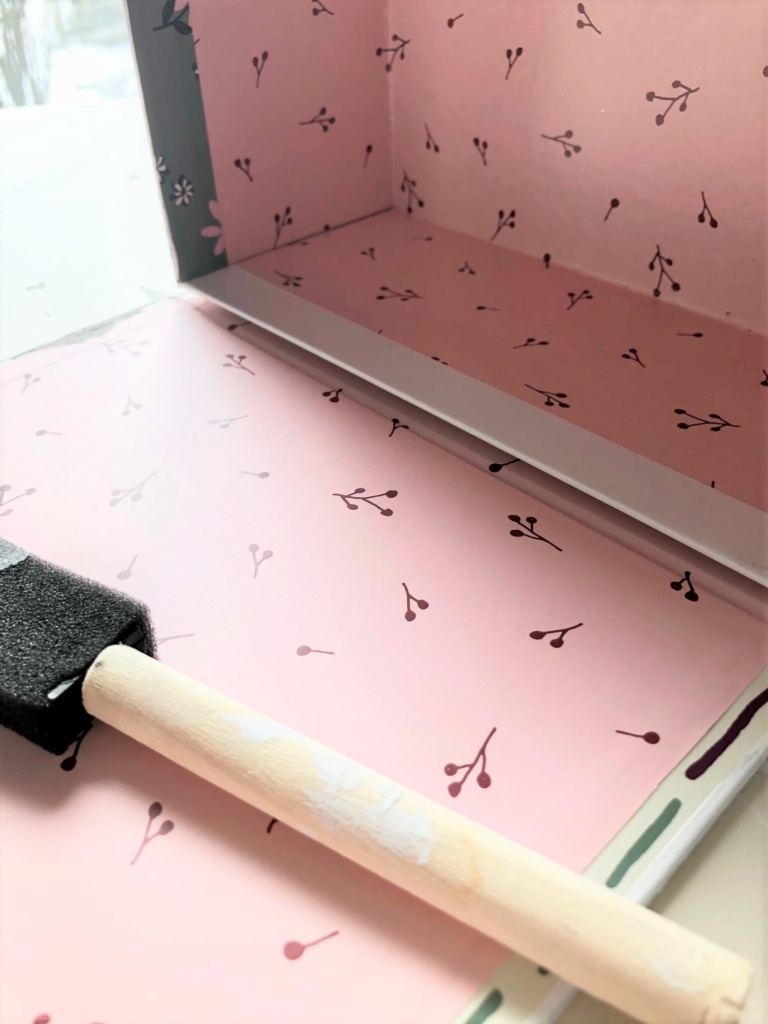
Now of course this is totally optional if your box is the same color as the shelf liner. Or, if you’re using a darker colored shelf liner that will cover up the box. In my case, I had to cover up both the inside and outside. I chose this soft moss color for the inside!
TIP: I used chalk paint because it basically covers ANYTHING without sanding. It also goes on well so I only needed two coats to cover my boxes.

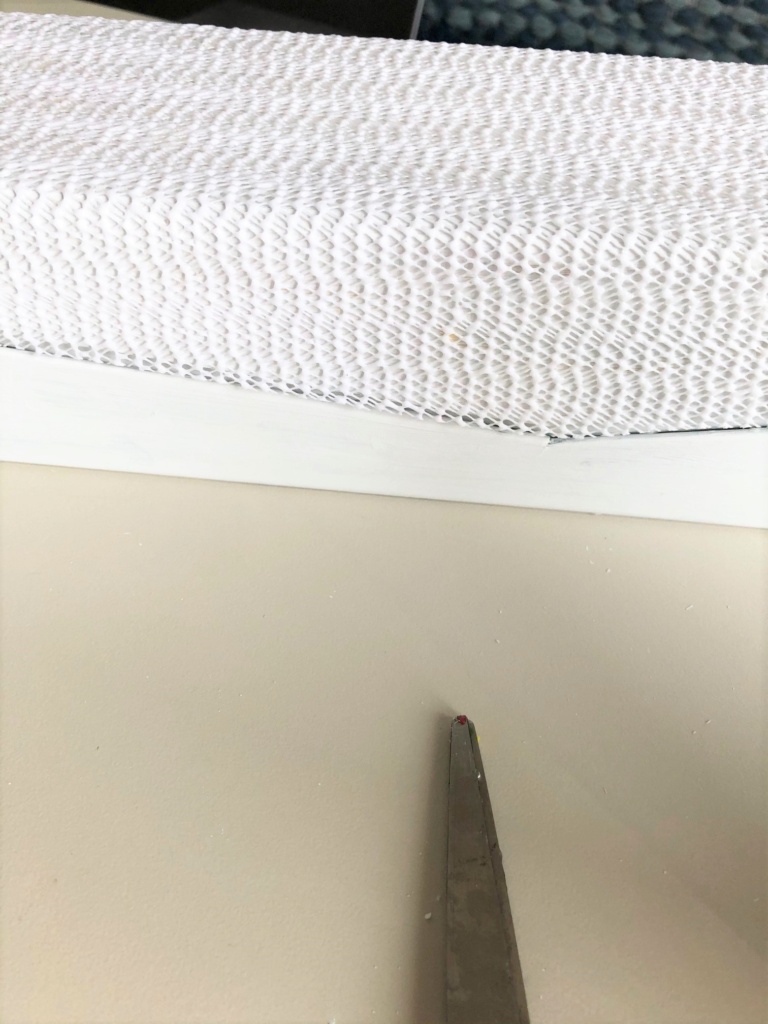
CUT AND ADHERE SHELF LINER TO BOXES
This step actually turned out to be easier than I anticipated. (YAY!) Here’s how I did it!
- I started with the top of my box. First, I sprayed the top and back with my adhesive spray. (Do this in a well-ventilated room it’s kind of stinky) Then I laid my shelf liner down (keeping the edge straight with the edge of the top of my box) and wrapped it around the back of my box.
- Once I had the liner pressed in place, I used scissors and cut off the excess. Then I trimmed everything up and moved on to the next section.
- I repeated the same steps as above for both sides and the front of my boxes. (I left the bottom as I didn’t see any need to cover it since it doesn’t show.)

ADD LEATHER PULL
I wanted to get as close as I could to the lovely leather latch on the Target inspiration. Unfortunately, I couldn’t find the leather key strap I’d seen at our local hardware store when I went back to get it. So I had to improvise.
You can find them on Etsy or Amazon too but they cost a bit more. Instead, I found an old leather purse that I was going to throw out because the strap broke.
It just so happens the strap had a similar design as the inspiration pull. IE: it was a bit darker in color. All I had to do was cut the strap in half and VIOLA two leather pulls!
TO ATTACH: I simply placed a bead of hot glue on the back and pressed the ‘pull’ into place.

Texture is HUGE for me now for some reason. Which is why these boxes really speak to me! I’m still not sure about the leather pull, but I can always switch it out once I find those darn key straps.

What are your thoughts on these DIY woven boxes?

They definitely have that ‘boho’ style I’m loving right now, and the options for color and design are really endless.
If you don’t like the texture of these shelf liners you could definitely use contact paper with a wood look or even a fun pattern.
However you do it, Covering inexpensive boxes is definitely a great way to add budget-friendly storage to any room in your home!

Looking for more DIY’s?
Thank you so much for stopping by!

[mc4wp_form id=”2342″]

These are so crazy cool, Christine, I am pinning them right now! You are spoiling us this week a bloody mary recipe and cute organization ideas – gah – SO GOOD! I’m always on the lookout for cute and inexpensive storage systems. It wouldn’t be too bad if you only needed a few boxes but sometimes I need from 10-20 boxes for a project which makes $15 each kind of crazy. Love this idea so much! It’s totally genius! Hugs, CoCo
I’m sorry you and Michael got sick!! I’m glad it wasn’t Covid, though. I hope you’re both feeling better!
This box is so neat and creative! What a great idea! Pinned and shared!
Thank you so much, CoCo! I totally agree with you on needing more boxes! I’m always on the lookout for some! Thanks again for sharing!
Aw, thank you so much, my friend! Us too! Thank you for sharing! 🙂