
DIY Snowfall Festive Christmas Wreath
how to create a high-end wreath with dollar tree items for Christmas & all winter long!

Hello, friends!
November is here and I’m teaming up with eight talented bloggers for another DIY Challenge, hosted by Terrie, from Decorate and More with Tip!
If you’re stopping by from Junk to Gems, Welcome!
This month’s challenge is all about Christmas! The challenge is that you have to use items you already have.
After looking through our Christmas decor, I decided I would make a wreath for the challenge. Last year I threw away a couple that had seen better days, so now was a good time to replace one of them.
During my inspiration research, I found this Mackenzie Child’s wreath that went perfectly with the glam look I want to give our dining room this year!

Isn’t it just GORGEOUS?!! I absolutely adore the glam look of it, but also the bit of whimsy that the checked ribbon provides.
Can you guess how much this wreath costs? $495, my friends! Yikes!
Although I LOVED the style of the wreath, I really wanted something fluffier and cozy. More like the Scandanavian Christmas style I used a bit last year.
Now that I had an idea of what I wanted to create, it was time to shop my house for what I could use to make it.

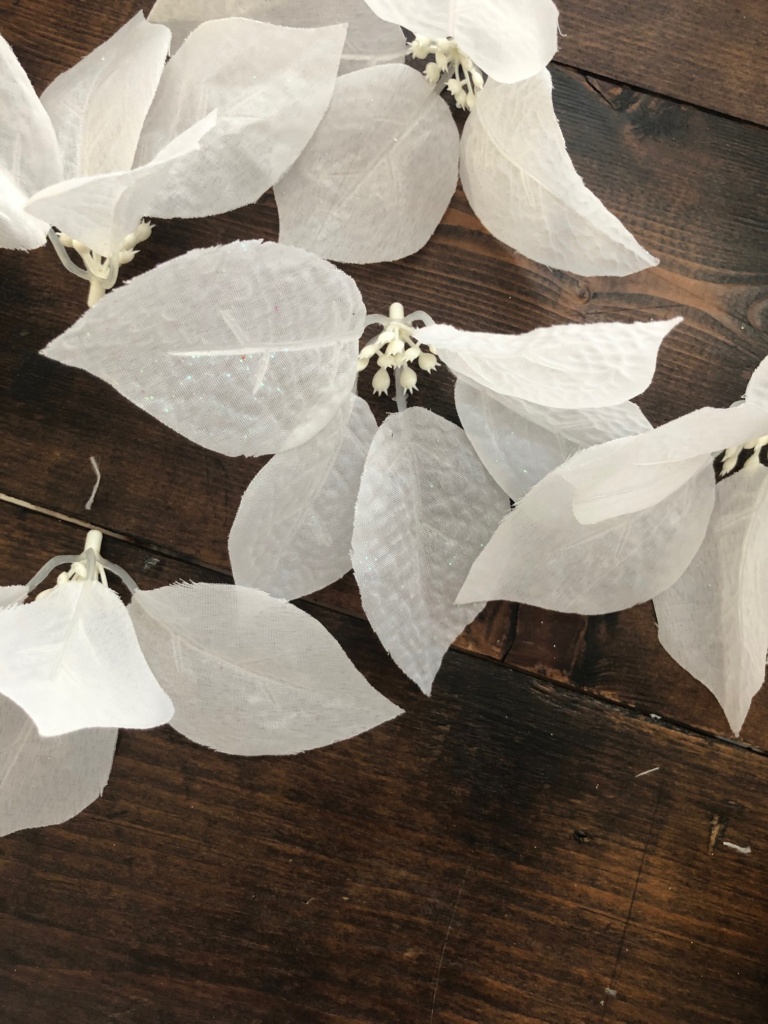
I found everything I needed in my Christmas and craft stash, except for the dusters. Which of course were in with my cleaning supplies. Yes, you read that right! Dusters! Years ago I remember seeing a wreath made out of hand dusters on Pinterest. They were the type with the handles. These are actually for mopping floors. But… they were white and fluffy. So perfect!
(Affiliate Links are provided for your convenience. If you make a purchase we will receive a small commission at no cost to you. Our full disclosure can be found here!)
Here’s what you’ll need:
- Wreath Form (I used an 18 inch)
- (5) Duster’s
- Large Gold and Silver Christmas Tree Balls
- Small Gold, Silver, & White Christmas Tree Balls
- Buffalo Check Ribbon
- White Pipe Cleaners
- E6000 Glue
- Glue Gun & Sticks
- White & Gold Poinsettias
- Glitter Snowflakes
- Bead Wire
How to make a snowfall festive Christmas wreath:
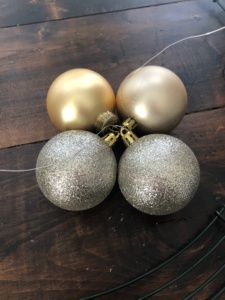
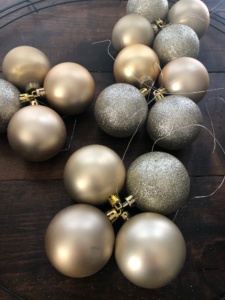
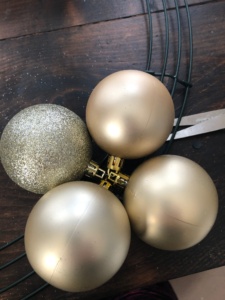
To start you will need to string four large Christmas balls together. I chose two champagne gold and two silver glitters for two groups of four, and three champagne gold and one silver glitter for two groups of four. For the size of the wreath form I had, I needed four groups of four total.
Then I used the excess bead wire and tied each group of Christmas balls to either side of the top and bottom of my wreath form.

attach a small Christmas ball to the center of the larger ones
I used my glue gun and attached a smaller Christmas ball to the center of the four larger ones to cover where they were tied together.
TIP: The larger Christmas balls were pretty secure just by tying them onto the wreath. But to make sure they didn’t move around I used my glue gun and glued one down to the wreath form.

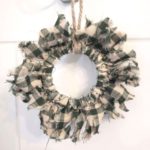
cover the bare areas of your wreath form with the dusters
Once the Christmas balls were in place I had four large areas that were bare on my wreath form. To cover them I simply folded a duster lengthwise over the wreath and glued the sides together.

fill in any additional bare spots around the Christmas balls.
To ensure the wreath was full and fluffy, I took one (1) additional duster and cut it into smaller pieces, and used them to fill in around the Christmas balls.

create mini buffalo check bows
To make the mini buffalo check bows like the inspiration piece had, I simply cut my ribbon into pieces and folded each one in half. The ribbon was not wired so to make it more solid I used some pipe cleaner. To create a bow I placed a piece of the pipe cleaner in the center of my folded ribbon and tied it in place.

attach bows to the wreath
Begin filling in the rest of the wreath by first attaching a white poinsettia to either side of the Christmas balls with a glue gun. Then attach a bow on either side of the poinsettias.
attach the gold poinsettias to the wreath
Like the white poinsettia’s I simply popped the flower off the stem and glued them onto the wreath. Again, just fill in both sides of the Christmas balls.

attach sparkling snowflakes
The last and final piece to my wreath were these sparkly snowflakes! Because you can’t have a snowfall wreath without snowflakes right? I placed two in between each group of Christmas balls and poinsettias. They are hard to see at this angle but they really do sparkle!

Friends, I’m not going to lie. This took a bit longer than I expected to put together, but I am OVER THE MOON thrilled with how my Christmas wreath turned out! It’s perfectly fluffy just like I’d hoped and has that touch of glam and whimsy just like the inspiration wreath!

The Bonus? I already had all the supplies so the wreath didn’t cost me anything extra. Since all of the supplies I used are from the Dollar Tree except for the ribbon you could probably make one for under $10!

Seriously, I cannot wait to start decorating for Christmas now in our dining room! I think my Snowfall Festive Wreath is going to be the perfect addition to the space!

I hope I’ve given you all inspiration to think outside the box when it comes to decorating for the Holidays. And remember, you don’t have to use expensive supplies to create expensive-looking decor!
If you like this Christmas DIY project I’d love it if you shared it!


Next up is Jodi from The House House, and don’t forget to check out all the other amazing Christmas inspiration in the links below!
Thank you so much for stopping by!


DECORATE & MORE WITH TIP | cloches & Lavender | PATINA & PAINT

BLESSINGS BY ME | BLUESKY AT HOME | JUNK TO GEMS


PALLET & PANTRY | THE HOUSE HOUSE | B4 & AFTERS
This turned out beautiful, I like it better than your inspiration picture. Beautiful job!
I’ve seen these dusters used in a few projects and I love them every time. Such a pretty job! I love it!
Great idea – I haven’t even given a thought towards Christmas decorating this year. I’m in a funk and it’s not good… Love what you did with this wreath base – maybe a simple wreath is what the season calls for this year. I may have to take a walk today to see what natural things I can find to incorporate with some bling. I like those ribbon tucks…
Hugs- Carole
I pinned it! So pretty!! I must add dusters to my craft stash….. 😊
Christine, you always make the cutest wreaths. This is beautiful in its white glory!
Cindy
Oh my goodness, Thank you, Corine!
Thank you so much, Tammy! I just love how fluffy they are!
Thank you, Carole! I know it’s a bit early but I’m super excited for Christmas! I’m so sorry to hear you are in a funk! If you need to chat you know how to reach me! Taking a walk sounds like an awesome way to clear your mind and heart! I can’t wait to see what you come up with for your wreath!
Thank you so much, Liberty! I used almost all that I had so guess what I need to mop my floors! LOL!
Aw, thank you, my friend! It’s so cozy and fluffy I almost hate to hang it too high! LOL!
Oh wow! This came out so beautiful. I pinned for later inspiration.
I can not wait to see your dining room with this wreath styling in it. It is going to be so elegant. I love it Christine. Those fluffy cleaning pads are used more for crafting than cleaning over at Decorate and More with Tip’s home. ha! Thanks for sharing. Love the wreath.
This is absolutely beautiful!! I cannot believe it was made with dusters! How creative!! I also can’t believe how much the wreath was that you used for inspiration. My goodness!! Pinning!!
CD, I love your wreath. It is so pretty and who would know about your secret “cleaning” ingredient. Fabulous idea!! Pinned.
Thank you so much, Jodi! I’m so glad you liked the wreath!
Thank you so much, Terrie! I’m super excited to get started on my decorating! I think I’ll be using those dusters for more than just cleaning too! I’ve already got another Christmas DIY planned!
Thank you so much, Michelle! Those dusters are AMAZING! I already have another craft project planned for them! And yes, that other wreath was TOTALLY out of this gal’s budget! LOL!
Thank you so much, Carol!
The moment I saw this post on IG, wanted to check out your post to see how you made them. What a great inexpensive idea for making the Christmas Wreath, it so pretty!! I love to do small creative projects on my own, and this would surely make it a fun one to do it with kids.
This is such a creative wreath, Christine! I love it! I can’t get over the dusters either. I swear I would have never have guessed that’s what it was. So excited to see that you’re using champagne and silver this year. I’m using lots of greenery and those same colors as our accent colors too. Can’t wait to see what all you have in store this season, CoCo
Absolutely, Aarthi! This would be super fun to do with the kids! I’m so glad you liked the wreath! Thank you so much!
Thank you so much, Coco! I’m so excited to start decorating!
Hi Christine! I made this with kids as a fun project , and my son took them to hang it in his classroom. It turned out great, thank you for sharing this.
Oh my goodness, Aarthi! That is wonderful! I’m so glad you enjoyed making the wreath and how fun to share it with your son’s class! You made my day, my friend! Thank you!