
DIY Pottery Barn Inspired Vases
How to create three pretty vases inspired by pottery barn using thrift store finds!
A few weeks back I was shopping online for some home decor items.
Nothing special. Nothing fancy. Just a few inexpensive(hopefully) pieces for our living room.
Pottery Barn is one of my favorite places to find inspiration, and I can often find some really good deals in their sales items. So I started there.
Unfortunately, that day I wasn’t having any luck and I was just about to close out of the site when these caught my eye!

Aren’t they just gorgeous? Oh my, sweet friends! I have to tell you I fell in love at first sight!
I swear I almost clicked “Add to Cart” so fast your head would have spun right around!
But then I looked at the price tag for all three and my heart sank. I definitely couldn’t afford to buy all three, and I didn’t get the same flutter in my heart when I pondered just buying one of them.
So I closed out of the site and decided to go with Plan B!
I began to search for similar vases in hopes that I could somehow re-create those lovelies.
Unfortunately, finding matches for those vases wasn’t as easy as I thought. I literally scoured every thrift store I could find but either the size was off or the shape.
I had almost given up and then I realized the vases don’t have to be exactly the same as the inspiration pieces.

So the first vase I purchased was this Home and Garden Bud vase. It’s pretty close to the medium size vase and the cost $1!

The second vase much smaller but I couldn’t find anything with the shape so I chose shape over size. This vase was also $1!

I found a lot of pottery-type vases that matched the largest vase perfectly but they were all too pretty and of course, cost more money. At long last, I finally gave in and just used one of my own vases that were similar in shape and height. That’s $0!
Once I had all the vases cleaned and ready to go, it was time to re-create those masterpieces!!!
Here’s what you will need!
(Affiliate links are provided throughout this post. These are products we use and/or recommend. If you make a purchase we will receive a small commission at no cost to you. Thank you for supporting our blog so we can continue to bring you free DIY content.)
3 vases
Spray Paint (I chose Grey for the base- White for the pattern)
Lace (whatever pattern you wish)
Scissors

The first step was to give each of the vases a light coat of grey paint. TIP: Be careful to hold the can at the recommended distance and again do a LIGHT coat to prevent dripping! Once that coat dried I gave each vase another coat and allowed it to dry overnight.
***For those of you who have a keen eye you might notice that the “after” smaller vase is a bit different than the “before” photo. You’re right!
I painted the vases outside and since it was a nice evening I left them to dry overnight. Unfortunately, the wind (or something) knocked that vase over and it fell off the table and smashed! 🙁 Since I wanted to get this project done in time I just grabbed another similar vase at our local thrift store the next day and forgot to photograph it before painting. Oops!
Anyhoo-back to the vases. It took a total of 3 light coats of paint to cover.

Next came the design on the vases. Believe it or not, I didn’t have ANY lace in my stash of fabric so I bought a small roll of it from the Dollar Store and about half a yard from the scrap bin at a local fabric store. Both were floral patterns.
I taped strips of lace from the roll for the medium-sized vase vertically and wrapped the other two vases with the lace I picked up at the fabric store. TIP: It is MUCH easier to just wrap the vases with one piece of lace than to do it in strips!
Once the lace was tight the vases were ready for the white paint.
***This step took a bit longer than I had originally planned. Mostly because you do still have to spray at the recommended distance and also spray lightly to avoid drippage. This means you will have to remove the lace to check the coverage after the first coat, and then reapply it and paint again until you have the results you want.

Update: After three light coats of white paint, I seriously thought I was done and was ready to wrap things up. But then I kept looking at the vases and I finally decided they needed to be a bit lighter. That’s the great thing about creating. You can keep on doing it until you get the results you want!
TIP: You can reapply your lace as many times as you like, just make sure the lace is dry and allow each coat to dry for at least an hour before reapplying.

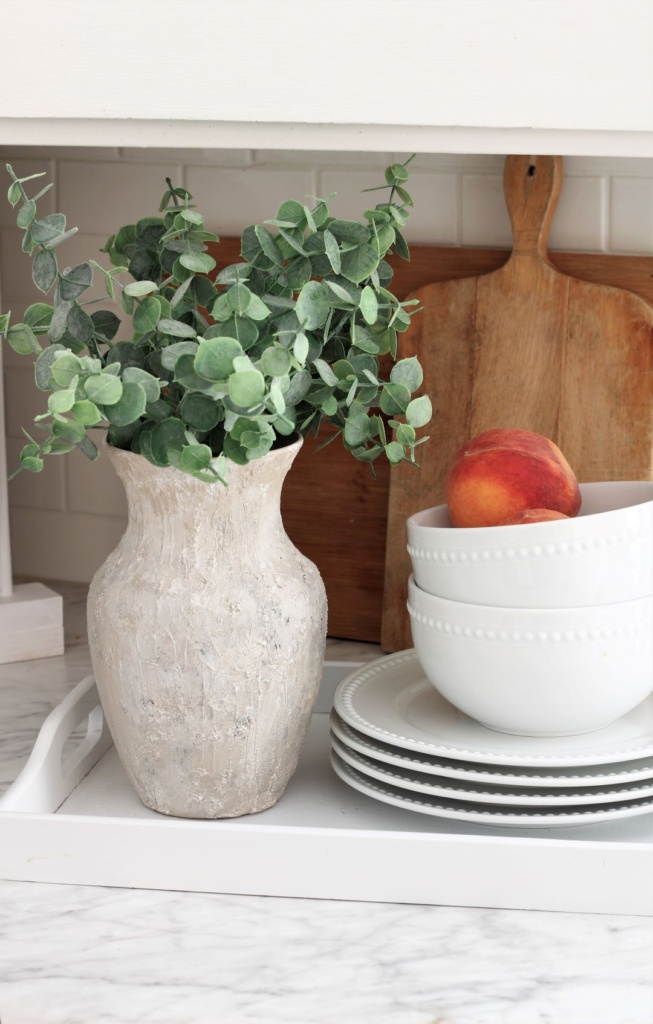
MUCH BETTER!
TIP: To avoid smudges let the paint set up before removing the lace.
The vases are obviously not EXACT matches to the inspiration ones but that wasn’t the challenge. My vases also have imperfections even after the second and third applications but again, I’m okay with that. Because…well, our home, like me and these vases are not perfect!
The real challenge for me was re-creating inexpensive thrift store junk into something pretty to use in our home!
And saving money too! The total cost for the vases was $2.50. (Because I had to replace the one that broke). The cost for the lace was $3. Since I already had the paint and clear coat the total investment in my DIY Pottery Barn Inspired Vases is a whopping $5.50.
That’s a savings of $154!!!
So yes my wallet is happy I didn’t click “Add to Cart” but more importantly, I’m happy I had the chance to be creative!

This kind of happiness is so much better than retail therapy happiness.
Of course, that doesn’t mean I won’t be shopping at Pottery Barn or a few of my other favorite decor stores in the near future.
I’m happy. I’m not crazy! LOL!
I hope this post inspires you to keep challenging yourself and to never give up creating!


Looking for more DIY Dupes?
SHOP THIS POST
[show_shopthepost_widget id=”4728228″]
DIY POTTERY BARN-INSPIRED VASES!
Wishing you all a FABULOUS weekend!
Thank you so much for stopping by!

Fantastic project and what a neat thing to share so others can learn to make their own too. I pinned this and completely get wanting to click buy and then stopping because you know you could make something like it. I did something like that recently while shopping with Robert and it involved a small leather purse. He picked it out, I loved it but stopped at the price and he’s saying buy it and I’m saying that’s too much. Well I ended up going back and buying it…. Moral of the story, well I’m not sure there is one unless knowing when you can make something similar and you nailed that perfectly. Great project friend love these vases.
These are absolutely beautiful!! I’m going to try this. Pinned it for later! I hope mine comes out as pretty as yours!
Thank you so much, Michelle! I’m so glad the post inspired you! I just know yours will turn out beautifully! I can’t wait to see! Thanks for pinning!:)
Thank you so much, Carole! This one was a bit of a challenge but I’m so glad I tried. I’m definitely going to try some more as it’s quite addicting to create just the right look! Congrats on going back and getting that purse! I would have too! 🙂
Wonderful idea! I think I’ll make some for Christmas presents, but I may leave them a little darker. I love yours, they’re beautifully staged!
Thank you so much, Antinia! Making these vases for Christmas gifts is a wonderful idea! This was a fun project and I love that you can create whatever design, color, and brightness you want. It’s all about creating YOUR vision! Have fun and thank you so much for stopping by!!
I’M A GUY, SO MAYBE NOT LACE….CHICKEN WIRE ? OR MAYBE THE SMALL-MESH USED TO HOLD CONCRETE IN PLACE ? MY GIRL REALLY LIKES PINK…
How do you keep the lace tightly wrapped for spraying? I. Other words, what holds it in place?
Absolutely lovely! Great idea!!
Bunny from Georgia
Thank you so much, Bunny!:)
Hell, Patricia! For the medium-sized vase, I used two-sided sticky tape to hold the lace strips in place on the inside of the vase and bottom. For the large and small one, I just draped the pieces of lace around the top of the vases and it fit snug. Then I smoothed it out around the mid and bottom part tucked the remaining under the vase to hold it in place. You could also lay the vase on it’s back and drape the lace over and spray. You will just have to remove the lace, allow drying time and repeat turning the vase to get all sides until you have the look you want. I hope that helps!!! Have fun!
Hello, Pat! Chicken wire and mesh would be AWESOME materials to use for this project! Pink and maybe cream or ivory as the accent would be lovely!!! Have fun!
I love ideas like this. Some many places to visit and get good deals, that can help us to imitate that expensive look of brand mane stores.
Thank you for sharing.
Oh my goodness, Carmen, you are so welcome!! Thank you so much for stopping by!!