
DIY Fall Raffia Wreath!
How to make a super fun, easy, and inexpensive fall wreath for your front door!
Hello, friends!
I know. I know.
It has been a L-O-N-G time since I shared a DIY here on the blog!
What with moving, and moving again, getting settled, summer vacation, and spending time with family, the summer seems to have vanished before my eyes.
And with it… a few DIY projects I’d planned before the chaos all began.
But things are FINALLY starting to slow down a bit, so I decided it was time to start filling our new rental home with a wee bit of fall.
Since I always started with our front door in our old house, I did the same here with a fun and SUPER easy fall wreath!

Initially, my idea was to make a wreath out of some pampas grass which I’m totally in love with right now. Unfortunately, it takes a bit of drying time and the weather hasn’t exactly cooperated with that. So…I decided to go another route, but I still plan on making one with pampas grass too!
what you’ll need to make the raffia wreath
- Raffia ( I used two bunches)
- 14″ Gold Wreath Ring (You could also use a wood embroidery hoop that you can find at thrift stores or Walmart for super cheap!)
- Leaves, Fall Floral Stems, Feathers, Mini Faux Pumpkins (I found all of mine at the Dollar Tree!)
- Hot Glue
- Scissors
what to do:
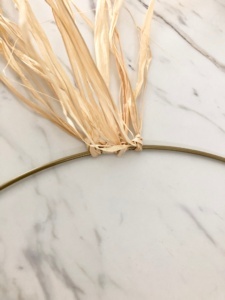
- If you purchase raffia as I did in bundles, you’ll first have to unravel the bundles. Once I had them laid out I separated the strands so they were easier to handle.
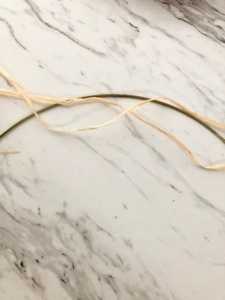
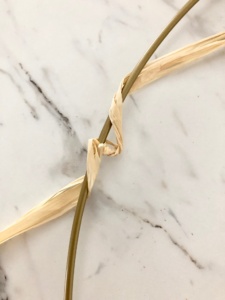
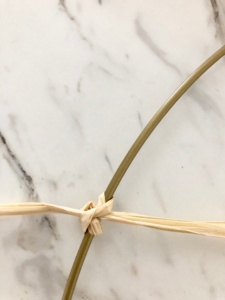
- Then I cut each strand in half. With both strands in hand, I wrapped them around the hoop and tied them into place. Then I took each end and folded it back over the hoop on either side. Next just bring each end together and tie a knot. (Or as some call it an overhand knot)
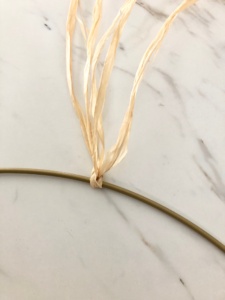
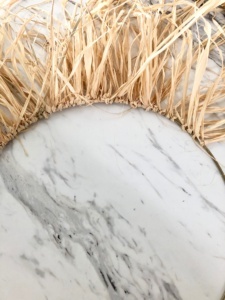
- Continue adding strands until your hoop is filled. Sidenote: This process is VERY time-consuming so I tied my strands while hubby watched Sunday football. I’m not a huge football fan but at least we got to spend time together doing what we both love to do!
- Once your hoop is full you will notice it is extremely ‘top heavy’ and droopy. That’s okay! Because your wreath just needs a haircut!

There are several ways you can do this but since I wanted an asymmetrical wreath, this is how I did mine.
- First I gave the entire wreath a hair cut-trimming the raffia back a bit.
- Then I went SUPER short on one side, leaving just enough of the raffia so it still looked full and fluffy. (About two inches)
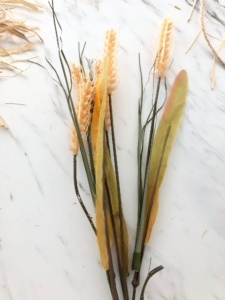
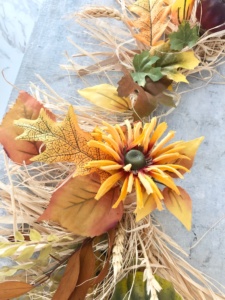
- Now that I had one side completed it was time to ‘pretty up the other side with plenty of fall flowers, leaves, dried wheat, and mini pumpkins.
- To do this I first separated the faux wheat stems and cut them at the base. Then I removed the sunflower tops from their stems (less bulk) and separated and cut the feathers and leaves.
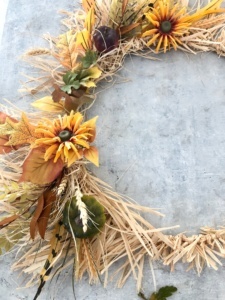
- Next, I laid out the arrangement on the fuller side of the wreath and played with it until it looked the way I had envisioned it.
- Lastly, I attached each of the stems, leaves, and pumpkins to the wreath with hot glue.

I haven’t hung the wreath up yet, as I’m waiting on a magnetic door hanger (we rent so it was the best solution). But when I do I’ll just add a piece of burlap. Easy Peasy!
I absolutely LOVE the simplicity of this wreath. And although I’m normally a neutral gal when it comes to color, I can’t help but fall in love with all the rich-warm tones that I’ve added with the florals and of course all the texture!
The best part? This wreath didn’t cost me anything to make as I had all of the materials on hand. But you could totally get all of the supplies at the Dollar Store or even a thrift store and have minimal investment.
This is important to me because I like changing out my wreaths every year so repurposing them is a MUST!
I hope you enjoyed today’s DIY post! It’s been a long time in the coming, but I’m super excited to share even more fall decorating ideas in the coming weeks!

Looking for more fall decor inspiration?
Thank you so much for stopping by!

This is such a beautiful wreath, Christine! It’s perfect for the Fall season and I love all the layers of texture and the pops of color too. Hugs, CoCo
This is so cute!! I had to pin it so I can remember it for later when I finally go through all my craft boxes. lol!
That’s so neat that you’re into pampas grass this year. Me, too!! There’s a spot beside our side porch that is covered in ivy and some weird-looking stuff that I want to get rid of and plant pampas grass. I think it’s so pretty! My mom has some in her front yard and my dad hates it. I told him he can bring it to my house! It’s huge! haha!
I cannot wait to see your pampas grass wreath!!
Oh my goodness, YES, Michelle! Pampas grass is AMAZING! I just found a wild patch nearby and picked a bunch! Would love to have some when we are in our forever home! Good luck with yours! Thank you so much for stopping by!
Thank you so much, CoCo! It was super fun to put together!
It was a treat to see your newsletter in my inbox this morning. This wreath is fantastic… I’m a raffia fan from the early 90’s, as it offers a wonderful natural look that never expires… Well not for me and you turned that frame into a beautiful work. Love this idea and now you have me wanting to make something similar… May have to go gather some magnolia leaf’s and pinecones today… Have a great weekend friend… Have missed our email chats… Carole
Thank you so much, Carole! I like to use what I have on hand when I do these projects. And I always have raffia! I use it to decorate my gift baskets, bread, jams, you name it. I just love it. Miss our chats too! Hope you and Robert are well!