
DIY Boho Style Easter Eggs
Create these fun boho-style easter eggs using inexpensive items from the dollar store!
Hello, friends!
Decoupage eggs are nothing new. I get that.
Those gorgeous-colorful eggs made from tissue paper or napkins are EVERYWHERE!
But what if you can’t find napkins or tissue paper with a pattern you like?
That’s exactly what happened to me.
I SO wanted to create some fun geometric patterned eggs using similar colors that I did when I made that wall art for our home office! Unfortunately, I only had two sheets of that paper I used left and only one fit what I had in mind.

I have to tell you, friends. All these bright colors are usually SO outside of my wheelhouse. If you’ve been around here for even a hot minute you know I’ve always been a TOTALLY neutral kind of gal.
But lately, these bright colors and amazing textures are making me smile. A LOT!
And so I’m going with it. Cause this gal needs all the smiles she can get!
With that said, I wasn’t too sure this paper would work. Like I said, most decoupage is done with thin tissue paper or one-ply napkins. It definitely would be easier to work with than this thicker paper, but I had to find out for sure.
Meanwhile, on a quick visit to my local Dollar General, I almost did the happy dance when I walked by their gift bag section and found these!
They were EXACTLY what I was looking for and they only cost $1!

Now that I had the colors and patterns I wanted, it was time to see if the plan in my head would actually WORK!
(Affiliate links are provided for your convenience. These are products we use or recommend. If you make a purchase we will receive a small commission at no cost to you. Thank you for supporting our blog and family!)
materials you’ll need to make boho-style eggs
- real or faux eggs
- Mod Podge
- Gift Bags with Geometric or Boho pattern
- small paintbrush
[show_shopthepost_widget id=”4700733″]
how to create boho style eggs
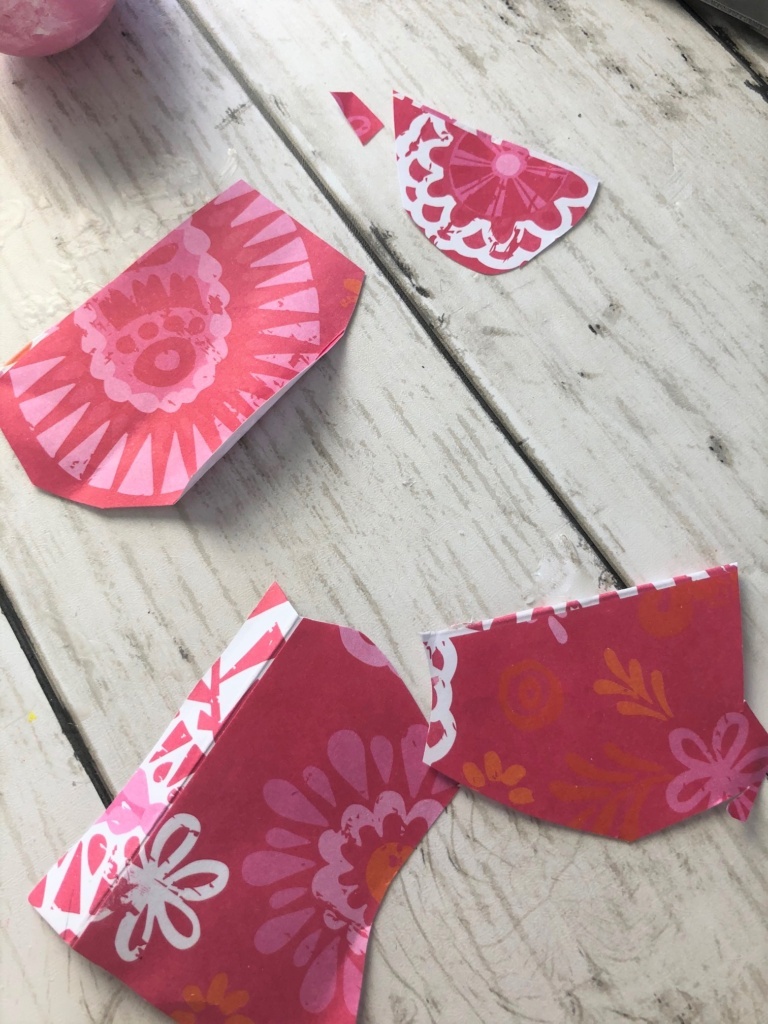
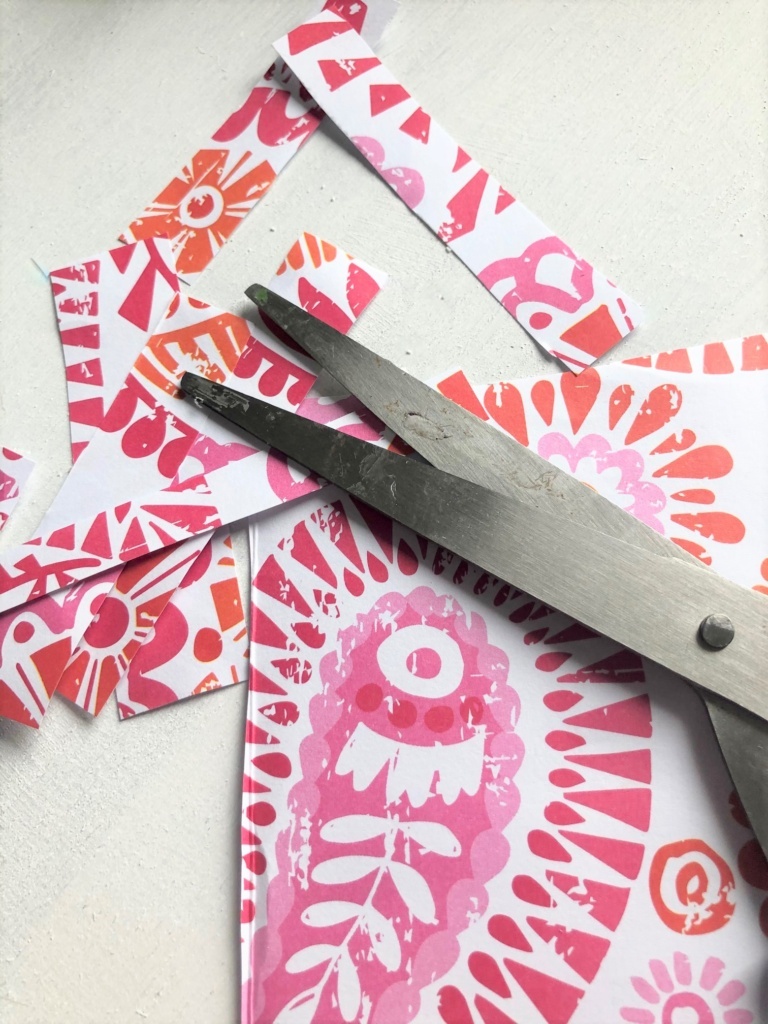
cut your paper/gift bags
This sounds easy but because of the patterns, it actually took a bit more time than I thought. To match up the pattern on one of the gift bags I needed to cut it into strips. But to match up to another gift bag I needed to cut out the shapes.
TIP: I bought one extra bag for each design (they were only $1) so I could look at how the design lined up before gluing it down.
glue your paper onto the eggs
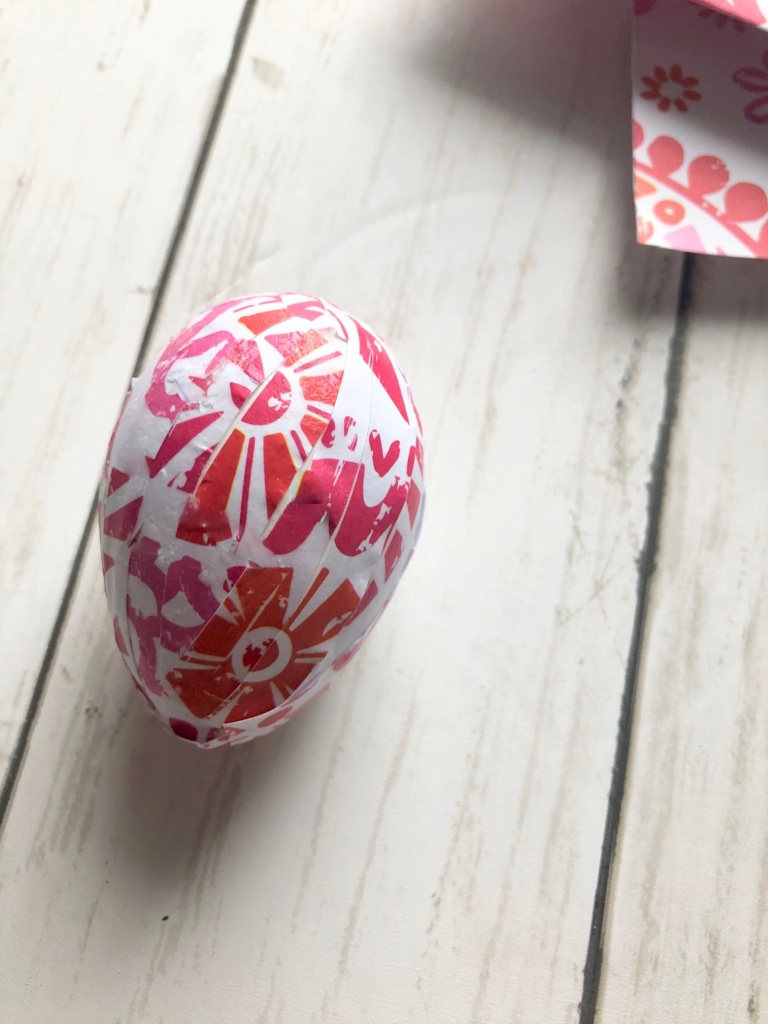
As I mentioned, my main concern was that because both the paper and the bags were heavier materials I assumed it would be more difficult to work with. Truth? It actually wasn’t at all. But I do have a couple of tips!
TIP: Complete a section and let it dry before adding more paper. This was a must because of the next tip! So to keep things moving I worked on three or four eggs at a time.
TIP: The paper and gift bags are stiffer than napkins so you will need a bit more glue to keep them in place. **I brushed a thin layer of glue on the egg first-then the back of my paper. Then I laid each piece in place. Using my fingers (worked SO much better) I placed a bit of the mod podge over the top of the piece of paper and pressed down the edges.
TIP: You will have wrinkles. I was able to remove most of them by pushing my fingers gently across the paper. But I think some wrinkles give the eggs character and more texture, so I wasn’t too concerned about them.

allow the eggs to dry completely
Since I had to use a bit more glue my eggs were a bit ‘sticky’ so I just set them in the egg crates and allowed them to dry for an hour or so.

I am absolutely OVER THE MOON thrilled with how these DIY boho-style Easter eggs turned out! They are so bright and colorful and yes, they TOTALLY make me smile!
I’m loving this modern pattern I chose but the options are limitless really. Gift bags come in all colors and patterns. The best part is they are just as available as napkins but they are actually cheaper and have more styles to choose from!

Have you tried decoupaging eggs yet?
I hope today’s post has inspired you to make your own bright and cheery Easter eggs!


SHOP THIS POST
[show_shopthepost_widget id=”4700733″]
Thank you so much for stopping by!

Ok, when is your book on dollar store crafts coming out because I swear you come up with the cutest stuff. I would have NEVER in a million years thought to look at the party bags. Love this creative idea so much. Once again, pure genius! Hugs, CoCo
Aw, CoCo! You just made my day! I’m so glad you enjoyed the eggs! They took a bit longer than I expected but I really love how they turned out! Thank you so much, my friend!
These are so pretty!! I never thought to use gift bags. What a great idea! (We should have been crafting together this week! LOL!)
I totally agree! Oh, what fun we would have, Michelle!