
A Sweet and Simple Spring Wreath
creating a spring wreath with repurposed items!
Hello, friends! Today I’m joining some very talented bloggers for another DIY challenge hosted by Terrie from Decorate and More with Tip! If you’re stopping over from Patina and Paint, Welcome!

The challenge for this month was to repurpose an item we already had into something for spring!
Since I always transition from season to season by creating a wreath for our front door, I decided that was what I would make for the challenge.
The challenge was trying to find something to make one with. Of course, I have plenty of grapevine wreaths I could have repurposed, but I wanted something different this year.
So I started looking through my craft supplies and I found several items I thought I could give new purpose to.

Although making a wreath from an embroidery hoop is nothing new for some, it actually is for me. I’ve seen them on Pinterest before and always wanted to make one, but just never got around to do so. The funny thing is, when I told a few of my friends that I was making one, they too said they always wanted to but for whatever reason hadn’t.
So hopefully today’s post will inspire someone to get out that embroidery hoop and create a pretty spring wreath!
(Affiliate links are provided for your convenience. If you make a purchase we will receive a small commission at no additional cost to you. Thank you as always for supporting our blog and family.)
what you’ll need:
- 12″ embroidery hoop (I used just the outer circle)
- Faux Floral Stems (I used large and small roses)
- Faux Greenery ( I used silver dollar eucalyptus)
- Floral wire
- Glue Gun
- Wirecutter
[show_shopthepost_widget id=”4700806″]
TIPS: If you don’t have an embroidery hoop you could also use a metal ring like THIS, or you could make one out of COPPER WIRE or even a coat hanger!
putting it all together:
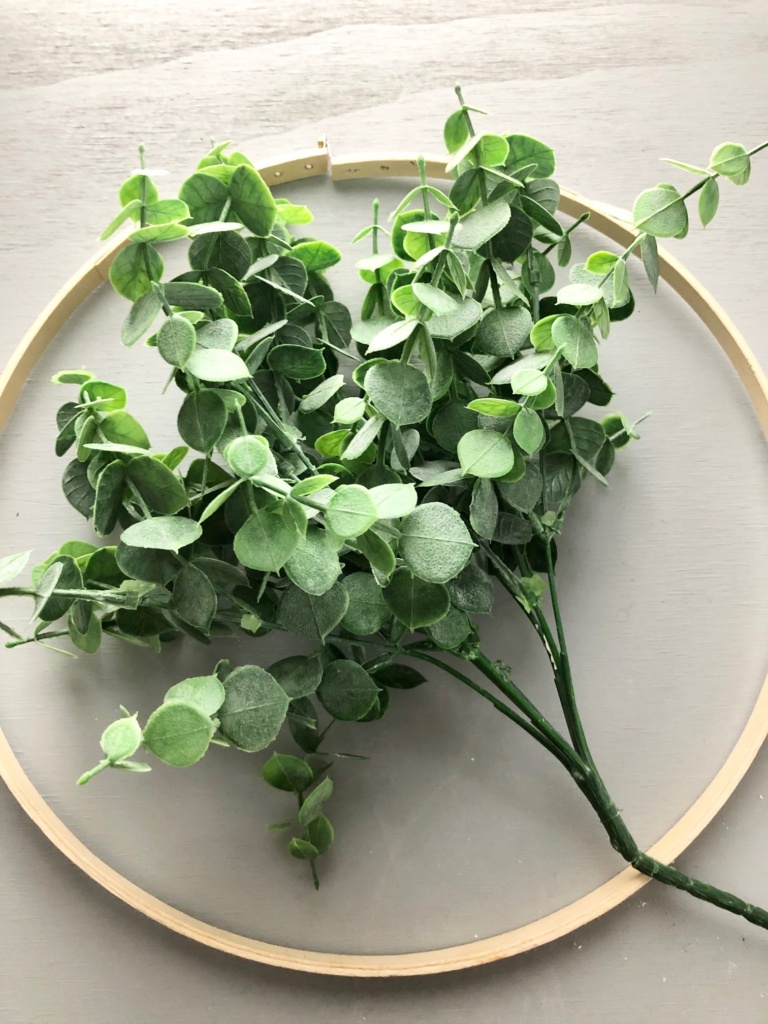
attach greenery:
- If your greenery is in a bunch like mine, you will need to cut individual stems.
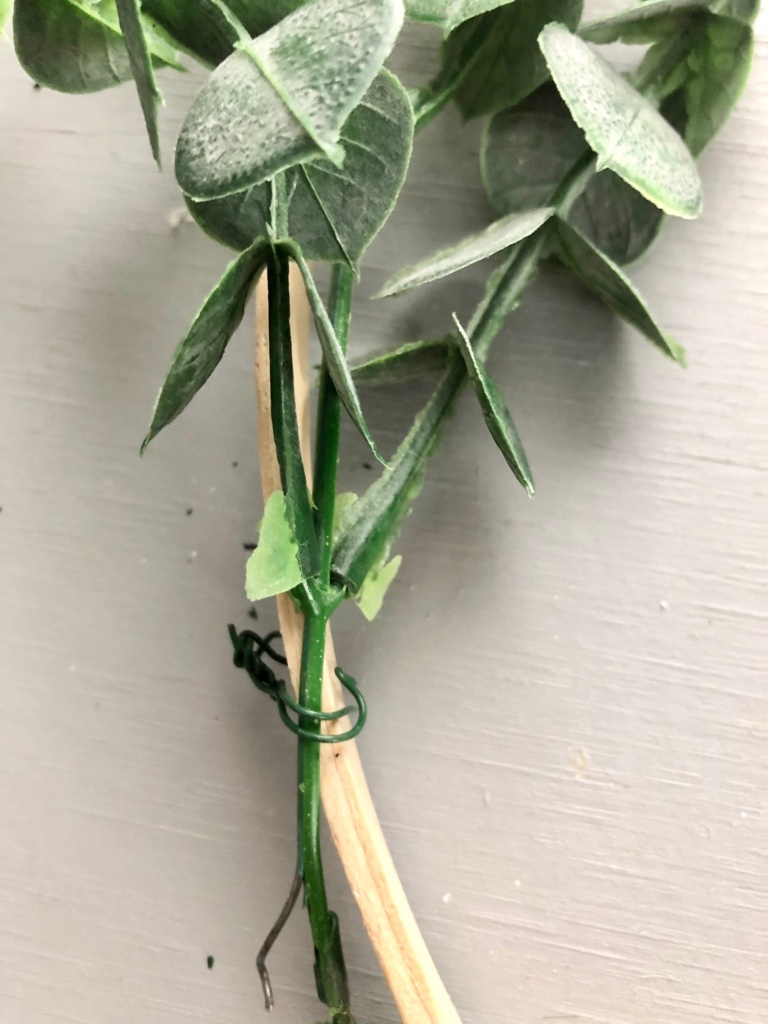
- Attach the stems to the embroidery hoop using the floral wire. (I just wrapped a small piece around the top and bottom of each stem.
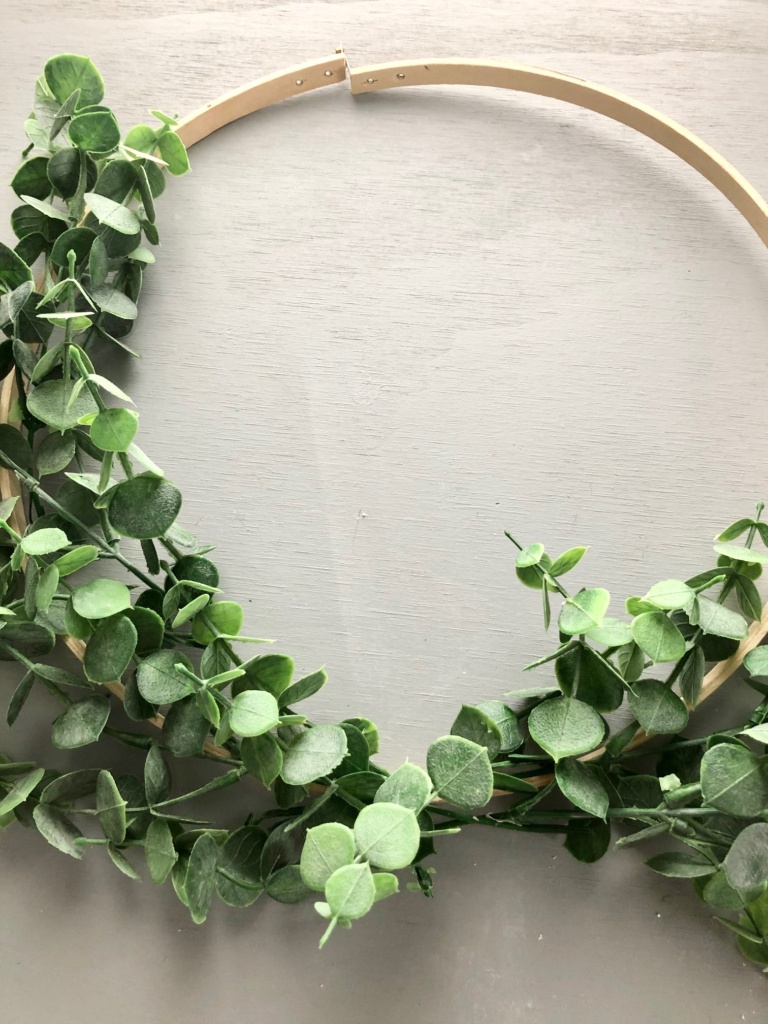
- Continue to add greenery until it looks full and has filled the embroidery hoop the way you want it. (I chose to do cover just one side of the hoop)

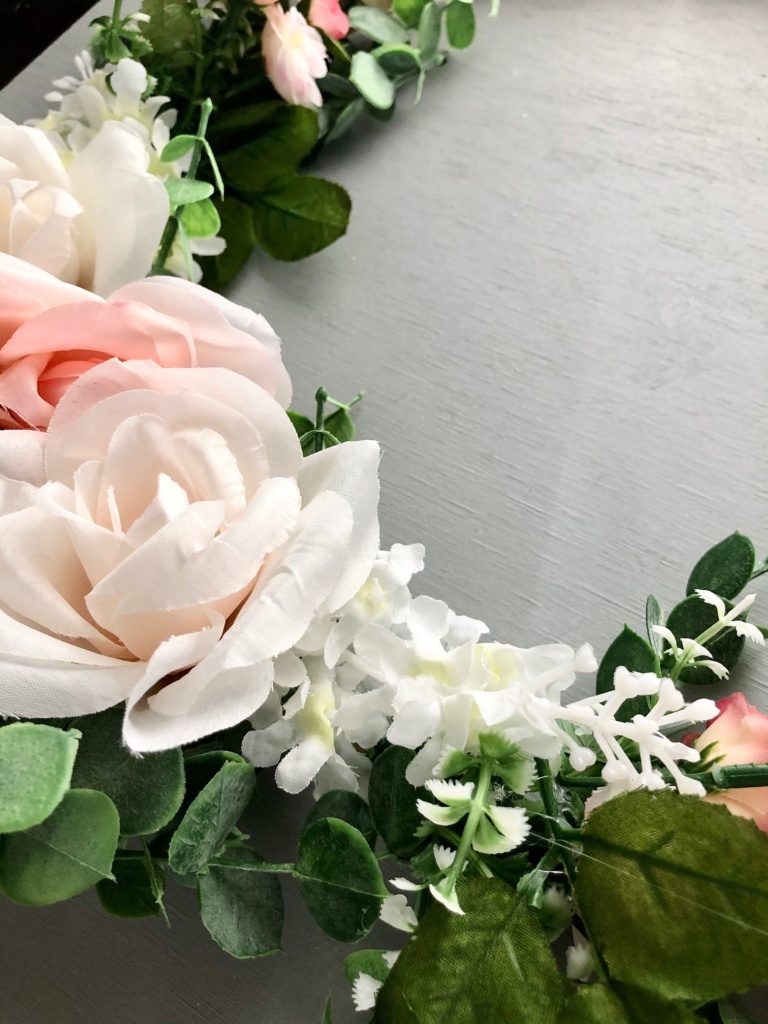
attach flowers:
- I removed each flower from its stem first.
- Then I did a ‘trial’ run to see how I wanted them to lay on top of the greenery.
- Once I had the look I wanted I began gluing the flowers on starting from the outside in.

attach decorative wire and beads to hang the wreath:
- I chose to hang my wreath by removing the ‘screw’ at the top of my hoop and putting a piece of gold wire through the hole.
- Then I placed four wooden beads on either side of the wire.
- Finally, I glued one last bead on the top to cover where I had bent the wire together.

And that’s it! In less than 15 minutes I created a SUPER sweet and SUPER simple Spring wreath! The best part? It didn’t cost me anything!!!

I honestly don’t know why I never made an embroidery wreath before. I absolutely LOVE how this one turned out! And can you believe those GORGEOUS roses came from the Dollar Tree? I just adore all that soft pink against the bright green. It just SCREAMS spring to me.
So, my friends, if you have an embroidery hoop just lying around-grab it and get creating!
Liberty from B4 and Afters is up next and don’t forget to check out the other talented blogger’s links below!
Here’s even more spring inspiration!


Thank you so much for stopping by!


DECORATE AND MORE WITH TIP | Blessings by me | JUNK TO GEMS | CLOCHES AND LAVENDERS


PATINA AND PAINT | PALLET AND PANTRY | B4 & AFTERS | PURPLE HUES AND ME

SWEET SOUTHERN GRACE
CD,
This turned out so soft and beautiful. You have inspired me to get out and make some hoop wreaths. Love the added beads, such a great idea and really added to it. Just started following you, im not sure why I wasn’t.
CD this is so pretty! I think I tried making one of these wreaths when it was first popular, but mine did not turn out so well! lol! I love that you added the wooden beads to the top.. After seeing yours, I’m thinking that I may need to give it another try. Thanks for sharing!
I love this wreath, the roses are so soft in color. I have not made a wreath from an embroidery hoop. Great tutorial.
Cindy
Wow, CD! Your wreath is so lovely and definitely shouts out “Welcome Spring” with those soft colored flowers! I love it!
Love the softness of the wreath, it is beautiful Christine. Great addition with the wooden beads, love anything with beads. 🙂 Your front door is going to be the envy of all your neighbors. Happy Spring my friend!
I haven’t made a hoop wreath yet, either. But I have an idea for one for Christmas! I have had a large oval hoop for about 3 years and haven’t done anything with it yet! I pinned yours. It’s beautiful!
Thank you so much, Liberty! Your Christmas wreath sounds awesome! Can’t wait to see it!
Aw, thanks, my friends! I’m loving those beads too! I still have some leftover so I need to come up with another project! LOL! Happy Spring to you!
Thank you so much, Gail! I LOVE those flowers! Still can’t believe they were only $1 for a bunch!
Thank you so much, Cindy! The roses are my favorite. I’m so glad you liked the tutorial!
Thank you so much, Tammy! It took me a bit of practice since it’s not the ‘normal’ wreath form I’m used to. I definitely hope you try making one again, Tammy!
Thank you so much, Corine! I’m so glad I inspired you and I appreciate the follow! I followed you right back! Not sure why I wasn’t either!
This is beautiful! I love how simple it is and the colors you chose are just perfect for spring! Pinning!
Thank you so much, Michelle! I love those soft pinks and greens for spring!
Your wreath turned out beautifully!!
This is such a beautiful spring wreath, Christine! I’m dying over that pink and green combination. It’s total perfection. Pinning and loving, CoCo
Thank you, Shae!
Thank you so much, CoCo! I’m so happy with the color combo too! It makes me smile every time I come in the front door!